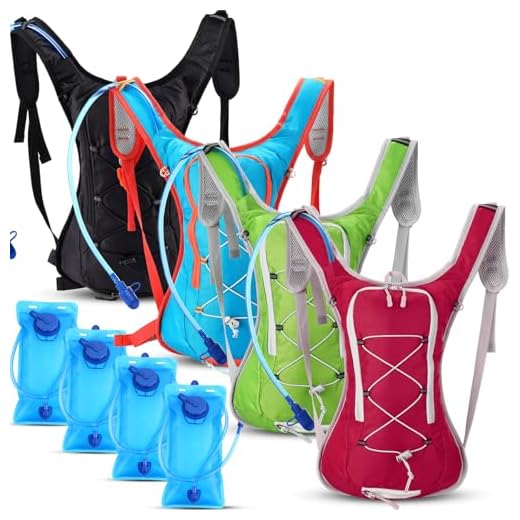

Do this now: empty every pocket, remove removable frame stays, hip belt and hydration bladder; unzip all compartments and shake out debris. Press wet panels with a microfiber towel for 10–30 seconds per spot, replacing towels as they saturate. For saturated foam, use a shop vacuum on low for 5–10 seconds per section to extract trapped liquid.
Air-out setup: prop openings with a wooden spoon or rolled towel to maximize circulation, hang the pack by its top loop or drape over a horizontal rod so both main compartments remain open. Position at 6–12 inches from a wall and run a household fan across, not directly into, the openings at low–medium speed. Typical timelines: light dampness clears in 4–8 hours, heavy saturation requires 12–48 hours.
Avoid direct heat sources: do not place on radiators, in a clothes tumbler, in direct sunlight for prolonged periods, or use heat guns. Sustained temperatures above 50°C can delaminate waterproof coatings and deform plastic frames; if applying warm air, keep it under 40°C and check fabric and stitching every 15 minutes.
To control odor and residual moisture: place 10–20 silica gel packets inside large packs overnight or stuff with dry towels to maintain shape while airing. For mildew spots, wipe with a solution of 1 part white vinegar to 4 parts water, scrub gently with a soft brush, rinse with clear water and continue airing until weight and smell return to normal. Wait at least 24 hours after airing before packing for storage or reuse.
Remove contents, separate soaked liners and electronics before airing out
Empty every compartment immediately: unzip all pockets, take out clothing, papers, food, removable foam inserts, hip-belt, and any sewn-in liners; place items on a towel-lined table for inspection.
Power off electronics, remove batteries and memory cards, and place devices in sealable plastic bags with silica-gel packets; leave sealed for 48–72 hours before testing power. If an electronic item was submerged, do not switch it on and arrange professional servicing after the desiccant period.
Remove hydration bladders and rinse with warm water and a teaspoon of baking soda if there’s odor; run water through the tube, hang the reservoir upside down with the hose open, and clip it so the mouthpiece points down. For stubborn trapped water channels, consider using compressed air following this practical guide: how to drain water from an air compressor a step by step guide.
For fabric liners and clothing: machine-wash synthetic liners on a gentle cycle if manufacturer instructions allow; otherwise hand-wash and wring gently. For the main shell, prop the bag open and stuff with dry cotton towels, swapping towels every 2–4 hours until towels show no dampness. Use a fan to create continuous airflow; if using warm air, keep temperature under 40°C and hold the nozzle at least 30 cm away in short bursts to avoid heat damage.
Place 5–10 small silica packets inside a medium pack or 10–20 for larger models; replace packets every 48 hours until moisture indicators read dry. Reassemble only after zips, seams and removable foam are fully moisture-free and no musty odor remains. Planning a longer trip or carrying camera gear? Consider appropriate carry options: best luggage for gap year and best messenger bag for street photography.
Rinse and spot-clean mud or stains, then gently wring excess water
Rinse fresh mud under cold running water within 15–30 minutes; use a low-pressure stream to push grit out of seams and fabric without forcing particles deeper.
For dried, caked mud: let debris harden, knock off large pieces outdoors, then brush remaining grit with a stiff nylon brush before rinsing to prevent abrasion.
Spot-cleaning method
Prepare a cleaning mix of 1 teaspoon (5 mL) mild non-detergent soap or technical gear cleaner per 1 litre (34 fl oz) of water. Test on an inconspicuous patch for 30 seconds. Apply with a soft toothbrush or sponge, work from the stain edges toward the center with 10–20 gentle passes, then rinse thoroughly to remove residue.
For oil/grease stains: sprinkle cornstarch or talc, wait 15–20 minutes to absorb oil, brush off, then treat with the diluted soap solution. For dye transfer, use an oxygen-based cleaner per label dilution, limit contact to 5 minutes and rinse immediately.
Removing excess water
Never twist straps, buckles, foam panels, or frames. Lay an absorbent microfiber or cotton towel flat, place the wet pack face-down, fold the towel over and apply firm pressure; roll toward one end in 10–15 passes to expel water. Repeat with a fresh towel until moisture stops transferring.
For pockets and narrow channels, press along seams with the towel roll or squeeze with palms, moving outward from the center. For padded hip belts and shoulder straps, compress repeatedly rather than wringing to avoid deforming foam. Use short bursts of low-pressure air from a pump sprayer to dislodge trapped water from zippers and folds if needed.
Avoid machine spinning, high-heat sources, and twisting around structural stays; maintain original shape of frames and padding while removing moisture to prevent warping or loss of support.
Hang and prop open compartments: hanger types and positioning for airflow
Place a wide-shoulder wooden or sturdy metal hanger through the main opening and prop the lid or top flap with a rolled towel or foam tube to create a permanent air channel.
Hanger selection
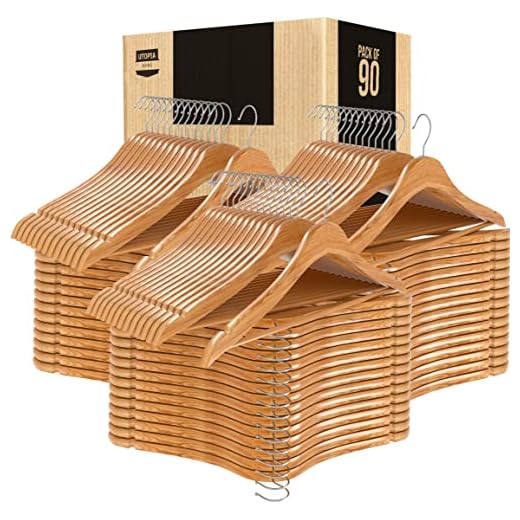
Use a solid wooden coat hanger for medium-weight packs to preserve shape; choose a welded-steel or heavy-duty carabiner+cord for saturated, heavy loads. Padded or wide-shoulder hangers reduce strap deformation on delicate fabrics. Multi-arm clothes hangers or pant hangers with clips work well for hipbelt pockets and external pouches; insert one clip per pocket and leave clips about 2–4 cm apart to keep seams from collapsing. For prolonged suspension, use a climbing-rated carabiner or metal hook (load-rated, ideally >5 kN) attached to a beam or clothesline to avoid single-point stress on webbing.
Positioning and airflow
Orient the pack so its largest openings face the primary airflow source: window, open door, or fan. For passive ventilation, set the opening toward a cross-breeze; for forced ventilation, position the pack at 15–30 cm from an oscillating fan on low–medium to encourage through-flow without fabric flutter. Unzip all compartments, unclip the hipbelt and sternum strap, and splay shoulder straps outward to expose foam channels and mesh. Prop narrow or tubular pockets with dowels, rolled socks, or plastic bottles to maintain an air passage; place props lengthwise to avoid stressing zipper ends.
Avoid direct, prolonged sunlight and close proximity to radiators or dryer vents to protect waterproof coatings and fabrics; brief sun exposure (under 1–2 hours) can speed moisture removal but rotate the pack so all panels receive airflow rather than continuous UV. For attic or rafters, suspend from two points spaced 10–20 cm to distribute weight and keep the base from folding closed.
Use heat safely: tumble-spin appliance settings, towel-wrapping and radiator precautions
Set the tumble-spin appliance to air-only or low/gentle heat and run 15–20 minute timed cycles, stopping to inspect foam panels, waterproof membranes and buckles after each cycle.
Limit surface temperatures to below ~40°C for coated fabrics and leather trims; polyurethane foams begin to deform around 60–80°C and laminates can delaminate above ≈50°C. Plastics and molded buckles may soften and lose strength above ≈70°C.
For rapid moisture extraction without high heat: place the pack on a thick cotton terry towel, roll tightly, compress for 30–60 seconds (stand on the roll or press firmly), replace with a fresh towel and repeat until towels show minimal transfer. Follow towel-extraction with a single 10–15 minute air or low-heat tumble-spin cycle to remove residual moisture.
Keep items at least 20–30 cm from flat-panel radiators; increase to ~50 cm if the radiator surface exceeds 60°C. Do not place gear directly on top of radiators or in front of fan convectors for prolonged periods. Limit continuous proximity to heated surfaces to under two hours for synthetic-coated fabrics; leather straps and natural fibers will stiffen and may crack if exposed above ~40°C–condition leather after warm-up.
Consult the product label: if it specifies no machine heat or no mechanical tumbling, avoid the tumble-spin appliance and rely on towel-extraction plus ambient airing or a ventilated rack. Test an inconspicuous seam for 10 minutes at the chosen setting before treating the entire item.
Check moisture, deodorize, and store to prevent mold and lingering smells
Inspect all compartments, foam panels and seam edges immediately: press a white paper towel against inner pockets and padding for 10 seconds – any darkening indicates residual moisture and requires further airing.
-
Confirm moisture status
- Paper-towel press test for pockets, hip-belt foam and laminated panels.
- Touch test: fabric should feel room-temperature and not cool to the touch; foam should compress and rebound without a damp smell.
- Use a room hygrometer near the storage spot: relative humidity should read below 50% (ideal 30–40%) before packing away.
-
Neutralize odors – three practical options
- Vinegar spray: mix 1 part white vinegar with 4 parts water in a spray bottle, test on an inconspicuous seam, mist interior lightly, ventilate 2–3 hours. Strong smells dissipate within 24 hours.
- Baking soda treatment: sprinkle 1–3 tablespoons into the main compartment and zip closed for 8–12 hours; empty and vacuum with a soft brush attachment.
- Adsorbents for persistent smells: place 25–50 g activated charcoal pouch per 20–30 L capacity inside for 3–7 days; replace every 6 months or when saturated.
-
Mold spot control
- Brush off dry spores outdoors using a soft brush; do not inhale – wear a mask.
- Wipe affected areas with 70% isopropyl alcohol or a 1:4 white vinegar:water solution, then air until paper-towel test shows no transfer.
- For heavy growth covering >10% of surface, consult professional textile-cleaning or consider replacement of contaminated foam inserts.
-
Storage setup
- Environment: cool, shaded location at 10–20°C and 30–50% RH; avoid basements and attics where RH commonly exceeds 60%.
- Container: breathable cotton bag or hang open in a closet. Do not seal in airtight plastic unless completely moisture-free and desiccants are present.
- Desiccant guidance: use 4–8 silica gel packets (10 g each) per 30 L pack; recharge packets per manufacturer (typically 120°C for 60–120 minutes for silica if specified).
- Scent control: cedar blocks or lavender sachets placed in pockets or between layers; avoid direct contact with light-colored fabrics to prevent oil staining.
-
Pre-storage checklist
- Empty all pockets and remove batteries, electronics and detachable hip-belt/shoulder straps.
- Label with date placed into storage and note any treated spots.
- Plan a monthly visual and sniff inspection during long-term storage; if mustiness appears, repeat airing and odor-treatment steps.
Repeat odor-absorption or spot-cleaning after any extended use; consistent checks and proper desiccant placement prevent mildew and lasting smells.


