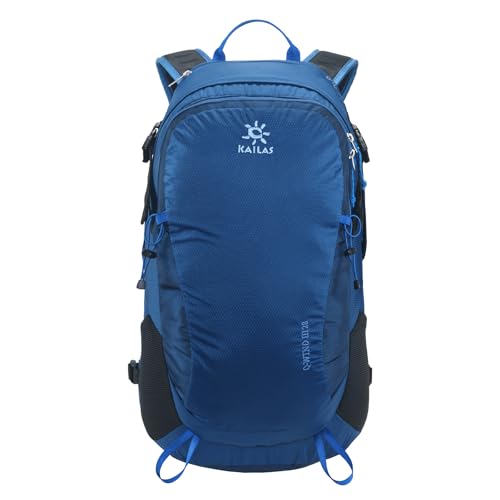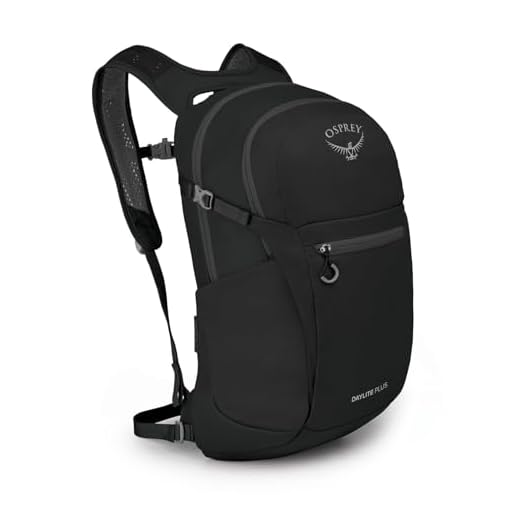


Select a 20–26 L commuter pack with a padded sleeve sized for a 15″ laptop (≈38×26 cm), a water-repellent outer (1000D Cordura or laminated polyester), YKK or equivalent coil zippers, and one sealed external pocket for phone and keys.
Aim for a total empty weight between 400–900 g. Choose shoulder straps ~40–50 mm wide with 10–15 mm closed-cell foam and a chest strap for load stability; add a removable hip belt if your daily load exceeds 5 kg. Look for back-panel mesh with at least 15 mm of airflow channels to reduce sweat buildup on commutes and bike rides.
Organizational features to prefer: one main compartment with a separate laptop sleeve, a quick-access front pocket with internal key clip, two side stretch pockets sized for standard 500–750 ml bottles, and an internal zippered RFID pocket (~12×10 cm). Expect a 20 L daypack to hold a 15″ laptop, a light jacket, lunch box and a 500 ml bottle; a 26 L carryall fits those items plus an extra pair of shoes.
Maintenance and safety: hand-wash with mild soap at ≤30°C and line-dry away from direct sunlight; avoid tumble drying. Choose models with lockable zipper pulls, reinforced seam stitching (~4 mm stitch spacing) and a short reflective strip (≈10 cm) for low-light visibility. Prefer brands offering a 2–3 year warranty and replaceable straps or buckles to extend service life.
Pick a 20–28 L daypack with a ventilated back panel and padded 15.6″ laptop sleeve
Pick a 20–28 L rucksack that weighs under 900 g, measures about 45×30×20 cm, and lists a safe load limit of 8–12 kg; these numbers balance daily carry capacity with all-day comfort for commuting and short trips.
Materials and weather protection
Choose a textile rated at least 400D nylon or 500D Cordura with a fluorocarbon-free DWR coating and taped seams on the main compartment. Look for YKK zippers with lockable sliders and TPU-coated fabric at the base. Water-resistance spec: withstands light rain for 30–60 minutes; add a 30 g foldable rain cover for prolonged exposure.
Organization, fit and features
Required pockets: padded sleeve for a 15.6″ laptop (internal dimensions ~38×26×3 cm), a soft-lined 120×90 mm phone/eyewear pocket, a hidden anti-theft pocket on the rear panel, and two exterior water-bottle holsters. Prefer a hydration-port-ready compartment for a 2 L bladder. Shoulder straps should be S-shaped, 2.5–3 cm thick padding, with a removable 4–5 cm hip belt and a sliding sternum strap for load adjustment. Compression straps should reduce volume by 20–30% when partially empty.
For travelers who carry electronics: choose integrated cable routing, a dedicated power-bank pocket with a USB-A or USB-C pass-through, and interior mesh dividers for chargers and SSDs. For photographers: a removable padded divider set designed to fit a mirrorless kit plus two lenses within the same 20–28 L footprint.
Maintenance and longevity: hand wash cold with mild detergent, air dry away from direct sunlight. Reapply DWR spray after three washes or when water no longer beads. Keep a small repair kit (two spare buckles, 30 cm webbing, Tenacious Tape) and register for brands offering a minimum two-year warranty or lifetime repair service.
Choose a harness and backpanel for all-day comfort
Choose a harness with adjustable torso length (±4 cm), S-shaped shoulder straps padded 10–15 mm and 40–60 mm wide, plus a hip belt 8–12 cm wide with 12–20 mm foam so the pelvis takes 60–80% of the load.
Measure torso from the C7 vertebra to the iliac crest and select a size or an internal/external adjustment that matches that length; typical ranges: S 38–43 cm, M 43–48 cm, L 48–53 cm.
Prefer a rear panel built from suspended 3D spacer mesh over a semi-rigid frame with a central ventilation channel 20–30 mm wide; recommended foam stack: structural closed-cell base, EVA 8–12 mm for cushioning, and 3D mesh 6–12 mm for airflow.
Use load-lifter straps set at 30–45° to bring the top of the carried mass close to the body; tighten until weight shifts off shoulders onto the hip belt, then secure compression straps to prevent load migration during movement.
Sternum strap should offer 6–12 cm vertical adjustment and an elastic insert to allow breathing motion; include hip-belt pockets for small items so frequent shoulder access is unnecessary.
Look for contact-point reinforcements: abrasion-resistant fabric, thermomolded polycarbonate or PE load-transfer plate, and reinforced bar tacks at strap terminations; target harness weight ≤400 g for daily urban use, 500–800 g for structured trekking systems.
Quick fit checklist: load with typical gear and walk 15–20 minutes, confirm no pressure points under collarbone, maintain a 20–30 mm gap between shoulder blades and panel for airflow, ensure hip belt sits centered on iliac crest and relieves shoulder pressure.
Arrange pockets for laptop, charger, and daily tech
Place the laptop in a dedicated rear-most sleeve with 10–12 mm closed-cell foam, microfleece lining, and a reinforced rubberized bumper at the base; allow +20 mm height and +15 mm width clearance beyond device dimensions and use a low-profile Velcro or thin flap closure for quick insertion.
Use this table for sleeve sizing and foam specs by common screen sizes (approx. device footprint in mm):
| Screen size | Approx. device footprint (W × H) | Sleeve internal dims (W × H) | Foam thickness |
|---|---|---|---|
| 13″ | 305 × 215 | 320 × 235 | 10 mm closed-cell |
| 14″ | 320 × 225 | 335 × 245 | 10–12 mm closed-cell |
| 15.6″ | 360 × 250 | 375 × 270 | 12 mm closed-cell |
| 17″ | 410 × 280 | 430 × 300 | 12 mm closed-cell |
Locate the charger pocket just forward of the laptop sleeve or in a side-access compartment: make the pocket 150 × 120 × 45 mm to fit most power bricks plus 150 mm of coiled cable. Add an elastic retention strap (20 mm wide) and a mesh divider for cable separation. Fit a rubber grommet for a USB-C or barrel cable pass-through so a plugged-in laptop can remain in its sleeve while charging.
Provide a dedicated power-bank pouch low and central to maintain balance: recommended pocket 110 × 70 × 30 mm for a 20,000 mAh unit. Include a short tether with a sewn-in loop and a USB-C female pass-through with a dust gasket. Mount the pouch so the power bank can connect to an internal cable harness without leaving the compartment.
Organize daily gear with a two-layer front organizer: one shallow lined pocket for phone (internal 165 × 80 × 12 mm), one padded pocket for wireless earbuds with soft lining and a small zippered mesh (90 × 60 × 10 mm) for dongles/SD cards, and three elastic loops for cables and a mouse. Use labeled elastic (6–10 mm wide) and soft microfleece pockets for scratch-prone items.
Use materials and hardware that reduce wear and accidental exposure: YKK water-resistant zippers (5 mm teeth) with zipper garages, TPU-coated ripstop nylon for internal surfaces near chargers, and bonded seams around foam edges. Avoid metal clips near magnetic-sensitive storage; use nylon webbing tabs for internal anchors.
Design notes for thermal and safety handling: keep chargers separated from power banks by at least one mesh divider to allow airflow and reduce heat transfer; place heat-generating bricks away from phone pockets; ensure internal pocket ventilation or perforated mesh if the pocket is intended for prolonged charging sessions.
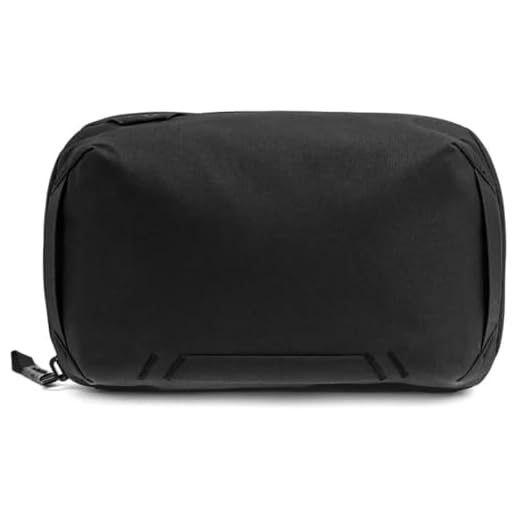
Include a removable tech organizer pouch (200 × 120 × 40 mm) with labeled elastic loops and a zip mesh panel so bulky adapters can be carried separately or swapped between different bags as needed.
Fit the pack to your torso length and shoulder width
Measure torso length from the C7 vertebra (most prominent neck bone) down to the top of the iliac crest; choose a suspension that matches within ±2 cm.
-
How to measure
- Stand upright. Palpate C7, place a tape, then find the iliac crest and measure straight down the spine.
- Record in cm and inches. Typical sizing guide: <40 cm (<16″) = XS; 40–45 cm (16–17.5″) = S; 46–50 cm (18–19.5″) = M; 51–56 cm (20–22″) = L; >56 cm (>22″) = XL.
-
Shoulder width and harness spacing
- Measure acromion-to-acromion (bony shoulder tips). Use these bands: narrow <36 cm, medium 36–42 cm, wide >42 cm.
- Straps should sit on the upper trapezius muscle, not on the neck. If straps rub the neck, switch to a narrower yoke or an adjustable harness with movable strap anchors.
- For broad shoulders choose harnesses with contoured, laterally set straps or removable spacer panels.
-
On-body adjustment sequence
- Fasten hip belt on the iliac crest; tighten until snug but not restrictive (aim to transfer ~60–80% of load to hips).
- Tighten shoulder straps so load sits close to the torso; avoid over-tightening – shoulders should bear only 20–40% of the weight.
- Set load lifters at ~10–20° angle to pull the load slightly forward and stabilize the upper frame.
- Clip sternum strap ~4–6 cm below the collarbone and slide it up/down for breathability and to prevent strap migration.
-
Packing for fit
- Place the heaviest items close to the spine and aligned between shoulder blades; top of that mass should sit roughly at the height of the shoulder harness anchor.
- If switching to a different suspension length, re-center internal loads to maintain the same center of mass relative to the harness.
-
Quick troubleshooting
- If the shoulder straps cut into the trapezius but hips feel unloaded: lengthen torso or move harness lower on the frame.
- If the hipbelt rides above the iliac crest: shorten the torso setting or try a deeper, more contoured hipbelt.
- If the pack leans away from the back: tighten load lifters and move heavy items closer to the spine.
-
Additional options
- Choose models with adjustable torso panels or modular harnesses for one-person multi-size use.
- Consider a travel duffel with a structured carry system for trips where torso fit is less critical: best luxury travel duffel bag.
- For outdoor setup and campsite stability accessories see best patio umbrella base with wheels.
- Gear cleaning and prep recommendations are available here: best pressure washers australia.
Protect contents with waterproofing and seam sealing
Specify fabric with a hydrostatic head of at least 5,000 mm and seams that are fully taped or welded to prevent water ingress under sustained rain and shoulder pressure.
Hydrostatic head explained: 1,000–3,000 mm repels light drizzle and splashes; 5,000–10,000 mm performs well in heavy rain and prolonged exposure; 10,000+ mm is recommended when gear will sit under pressure (e.g., leaning against wet surfaces or riding in storm conditions). PU, siliconized nylon and silicone-coated nylons provide high HH when combined with a quality waterproof membrane (ePTFE/PFOA-free variants offer breathable waterproofing).
Seam options and fixes: sewn seams create needle holes–use fully taped seams or welded construction for continuous protection. For repairs, apply heat-activated seam tape or a liquid seam sealant (apply inside seams, allow 24–48 hours cure). Use seam tape for long runs and seam sealant for point repairs or curved seams; choose solvent-free sealants for delicate laminates.
Closures and zipper strategy: prefer roll-top or taped zip flaps as primary closure for the main compartment. Where zippers are unavoidable, select PU-laminated or water-resistant coil zippers (e.g., Aquaguard-style) and protect them with external storm flaps. Keep vulnerable openings elevated above the base and weld small accessory pockets rather than sewing them into low seams.
Maintenance and testing: clean fabric with a technical cleaner (Nikwax Tech Wash or equivalent), avoid detergents and fabric softeners, then reapply DWR with a spray-on or wash-in product (Nikwax TX.Direct, Revivex). Reactivate many DWRs with low heat in a dryer for 10–20 minutes–follow manufacturer guidelines. Perform a spray test every 3–6 months or after heavy soiling: water should bead and run off; if it wets out, reproof or repair seams.
Field repairs and emergency protection
Carry a small repair kit: heat-activated seam tape strips, a tube of seam sealant (silicone or urethane), and a compact dry bag or sealed zip pouch for electronics. For quick fixes, place items in a trash-compactor bag or dry sack and keep critical gear off the wet base until full repairs are possible.
Quick repairs and cleaning: zippers, straps, and fabric care
If a slider sticks, clear grit with a soft brush, then run paraffin wax or a dry silicone lubricant along the teeth and cycle the slider 5–10 times to restore smooth travel.
Zippers – field fixes and repair steps
Remove sand and grit with a soft toothbrush; compressed air helps dislodge particles from metal teeth. For lubrication choose: paraffin or beeswax for long-lasting dry lubrication, powdered graphite for metal teeth, or a silicone-based spray for molded plastic teeth. Apply sparingly, wipe excess, and test slider movement.
If the slider no longer meshes the teeth, measure the teeth width (common sizes: #3, #5, #8). To realign a loose metal slider, pinch the back and front faces with needle-nose pliers to reduce the internal gap by ~0.3–0.6 mm; work in small increments and test after each adjustment. To replace a slider: remove the top stop with a small flat tool, slide new slider on, then install a new metal stop or stitch a bar-tack across the tape to act as a stop. If teeth near an end are missing, shorten the zipper by 2–4 teeth and reinstall a stop at the new end.
Carry in a field kit: spare sliders in #5 and #8, 2–3 metal stops, a short length of #5 zipper tape and a small pliers. For permanent shop repair, a replacement zipper should match tape width and tooth type (coil vs metal vs molded) and be sewn with heavy polyester or bonded thread.
Straps, webbing and fabric care
For webbing tears, replace with matching width: common widths are 25 mm (1″) and 38 mm (1.5″). Overlap new webbing by 40–60 mm and secure with a box + X stitch or multiple parallel rows; machine needle 100/16 or 110/18 and heavy bonded polyester or nylon thread are typical. For hand repair use a sailmaker’s needle and waxed polyester thread, performing at least 6–8 passes on a bartack area.
Rivets and hardware: use solid rivets 5–8 mm (3/16″–5/16″) for anchor points on heavy loads; set with proper anvil and setter to avoid crushing adjacent fabric. Replace broken ladder-locks or side-release clips with identical width hardware to preserve strap routing and tension.
Clean fabric with lukewarm water (<30°C / 86°F) and a pH-neutral detergent at 5–10 ml per litre of water. Pre-brush dried mud, treat oil/grease spots with a small amount of dish detergent, and rinse until no soap remains. For biological stains (sweat, food) test an enzyme cleaner on an inconspicuous area first. Avoid bleach and fabric softeners.
Machine washing: allowed only on simple, frame-less packs without leather trim–use gentle cycle, cold water, and place the bag inside a pillowcase or laundry bag to protect hardware. Air dry with openings and pockets unzipped, hanging with the mouth down to drain; avoid tumble dryers, irons, and direct heat sources.
Small tears and punctures: round-corner adhesive patches (minimum 20 mm overlap) or urethane repair tape bond best on clean, dry fabric; press firmly and accelerate adhesion with low heat from a hairdryer. For seams that must bear load, sew a reinforcing patch and apply seam tape or a flexible adhesive on the inside panel for abrasion protection.

