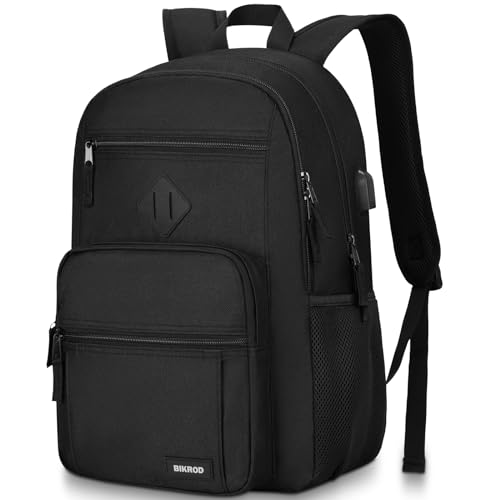
Maintain carried mass at 10–15% of the individual’s body weight; for children under 10 years aim for <10% of body mass. If the child reports discomfort or visible postural change, reduce the load toward the lower bound immediately.
Concrete examples: a 6‑year‑old averaging 20 kg – target load ~2 kg (10%); an 8‑year‑old at 25 kg – ~2.5 kg; a 10‑year‑old at 30 kg – 3–4.5 kg (10–15%); a 14‑year‑old at 50 kg – 5–7.5 kg. Treat the upper limit (15%) as a temporary maximum for short durations only; sustained carriage near the upper limit increases likelihood of pain.
To measure actual carried mass: use a household scale to record body mass without the bag, then again while carrying the bag; the difference equals the load. Track this weekly during heavy assignment periods and after adding new supplies or devices.
Fit and load distribution: use both shoulder straps and fasten a sternum strap; add a padded hip belt when the load exceeds ~7 kg to shift weight to the pelvis. Position the heaviest items closest to the torso and centered between shoulder blades, keep bulky lighter items outward. Adjust straps so the bag sits roughly 2–3 cm above the waistline; a low‑hanging bag increases lumbar torque.
Practical reductions: replace multi‑subject binders with daily‑use folders, move textbooks home when not needed, use digital textbooks selectively, swap duplicate supplies at school/locker, and consider a wheeled case for loads persistently above 15% of body mass. Monitor reports of fatigue, numbness in arms or shoulders, and changes in gait – these signal immediate load reduction and a reassessment of packing habits.
Maximum load per child: bodyweight percentages and example calculations
Recommendation: limit carried load to 10–15% of a child’s body mass; older teens can tolerate up to 20% only for brief trips.
Calculation formula
Allowed load (kg) = body mass (kg) × percentage (as a decimal). Example: 35 kg × 0.15 = 5.25 kg.
Practical percentage guidelines by age
- Age 5–8: target ≤10% of body mass
- Age 9–12: target 10–15% of body mass
- Age 13–18: target 15% for daily carry; up to 20% for short durations
Example calculations (10% / 15% / 20%)
- 18 kg child: 1.8 kg / 2.7 kg / 3.6 kg
- 22 kg child: 2.2 kg / 3.3 kg / 4.4 kg
- 30 kg child: 3.0 kg / 4.5 kg / 6.0 kg
- 40 kg adolescent: 4.0 kg / 6.0 kg / 8.0 kg
- 60 kg adolescent: 6.0 kg / 9.0 kg / 12.0 kg
If a bag’s measured mass exceeds the target for the child, remove unneeded items, redistribute weight close to the torso, or consider alternatives such as a wheeled case or locker storage. Check bulky extras that add several hundred grams (example product comparisons: best led outdoor umbrella) and electronics (see a compact option: best digital camera for 1080p).
Use a digital luggage or bathroom scale plus a tare/subtraction routine to obtain precise packed rucksack weight
Step-by-step measurement
1) Place the empty rucksack on a flat digital scale, record the reading as W_empty (kg or lb). 2) Load the rucksack exactly as it will be carried for the day (textbooks, notebook, pencil case, packed lunch, full water bottle, outerwear) and close zippers; place the loaded rucksack on the same scale, record W_loaded. 3) Calculate carried mass: W_loaded − W_empty. Example: W_empty = 0.9 kg; W_loaded = 5.0 kg; carried mass = 4.1 kg.
Alternative: if only a person-scale is available, record the person alone (P_alone) then the person while holding the loaded rucksack (P_with); carried mass = P_with − P_alone. Keep shoes and clothing identical between readings and hold the bag in the same position each time.
Accuracy and practical tips
Use a digital device with 0.1 kg (100 g) or 0.2 lb resolution for general checks; use a kitchen scale with 1–5 g resolution for individual items (snack, pencil case). Engage the tare/zero function before placing the rucksack on the plate or hanging hook. Calibrate by measuring a known mass (1 kg sugar bag or bottled water). Repeat measurements three times and take the median reading to reduce random error. Avoid carpeted or uneven floors for platform scales; center the load and tighten straps to remove loose swings. For hanging scales, attach to the top carry loop, lift slowly until the display stabilizes and avoid swinging; many luggage scales read to 0.1 kg.
Include liquid weights in estimates: a 500 ml bottle ≈ 0.50 kg, 1 L ≈ 1.00 kg. For portable scale or carry-gear options consult best luggage for traveling with baby.
Pack smart: item checklist and placement to reduce back strain
Daily checklist
Carry only items required that day: laptop 11–13″ – 900–1,300 g (place in main compartment against the spine); tablet/e-reader – 300–600 g (small front sleeve); hardcover textbook – 800–1,200 g each (limit to one; keep vertical and adjacent to the back panel); softcover workbook/notebook – 150–400 g each; folders/loose papers – 50–150 g; pencil case – 150–250 g; full water bottle 500 ml – ~500 g (side pocket or remove and refill midday); packed lunch – 300–600 g (store low and forward of heavier items); lightweight jacket – 200–400 g (compress or clip externally); PE/kit bag – 300–600 g (locker when available); umbrella – 200–400 g (external pocket).
Placement and adjustment rules
Place the heaviest items closest to the spine and centered between the shoulder blades and lower ribs (approx. 10–20 cm below the top of the shoulders). Stack medium-weight items in front of heavy ones; keep light, bulky items at the outermost layer. Use a narrow vertical orientation for textbooks to reduce lever arm. Secure loose items with internal compartments or compression straps to prevent shifting.
Tighten shoulder straps so the top of the load sits at the base of the neck and the bottom rests roughly 5–10 cm above the iliac crest (top of the hips). Fasten a sternum strap about 5–7 cm below the clavicles to stabilize the load without restricting breathing. If a hip belt exists, fasten and preload it firmly to transfer approximately 20–30% of the carried mass onto the pelvis.
Balance left-to-right: place similar-weight items in both side pockets or mirror weights across compartments. Avoid storing heavy objects in external side pockets. Use a single main compartment for dense items and smaller pockets for pens, keys, and electronics to maintain a low centre of gravity.
Minimize carried mass by rotating textbooks with a locker or classroom stash, using digital copies where permitted, swapping full water bottles for refillable light containers, and selecting soft-cover editions when available. Alternate shoulder use only if a single-strap option is unavoidable; otherwise use both straps every trip.
Warning signs of an overly heavy pack and immediate fixes
If shoulder straps dig in or hands/fingers go numb, stop wearing the load, remove nonessential items, place the heaviest pieces in a locker or hand-carry them, then refasten the hip belt snugly across the top of the pelvis and reposition the bag so its top sits about 1–2 inches below the base of the neck.
Visible and sensory red flags
Deep red strap marks or skin blanching that persist more than 20–30 minutes after removal indicate excessive pressure and require immediate reduction of carried items.
Tingling, numbness, pins-and-needles or loss of sensation in the hands, fingers or forearms is a warning of nerve compression; if these symptoms continue after 30 minutes of rest off the shoulders, arrange medical evaluation.
Sharp or shooting pain radiating down an arm, sudden weakness in grip or drops of carried objects are emergency signs – stop, remove the load, and seek urgent care.
Marked forward lean, shortened stride, difficulty climbing a single flight of stairs, or a noticeable limp while carrying are functional cues to reduce load and redistribute immediately.
Pain rated ≥4 on a 0–10 scale that appears while carrying and does not improve within 30–60 minutes after removal requires professional assessment.
Immediate corrective actions and follow-up thresholds
Step sequence: 1) Stop and set the bag down; 2) Remove nonessential items until straps no longer indent; 3) Move remaining heavy objects close to the spine and low in the main compartment; 4) Fasten hip belt snugly over pelvic bones and use both shoulder straps; 5) If available, switch to a wheeled case or split load between two carriers.
Strap fit targets: shoulders padded and even, no gap greater than 1 inch at the top, overall bag height ending 1–2 inches below neck base. Hip belt placement: across iliac crests, tightened to transfer pressure off the shoulders.
First-aid for acute muscle strain: remove load, apply cold packs 10–15 minutes every 2–3 hours for the first 48–72 hours, then consider moist heat for stiffness. Use over-the-counter pain relievers following package directions or clinician advice.
Seek medical or physiotherapy review if numbness, progressive weakness, loss of bowel/bladder control, visible deformity, breathing difficulty, or symptoms that do not improve within 24 hours are present; consider a posture and load-assessment session if carrying-related aches recur more than twice in a month.


