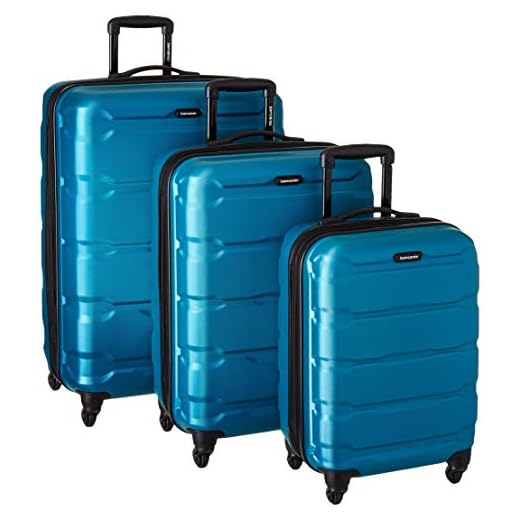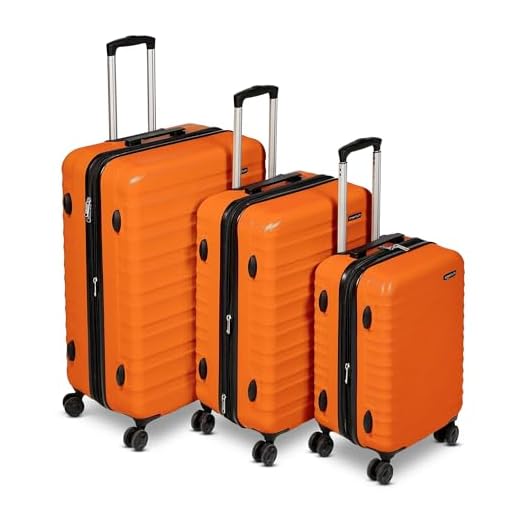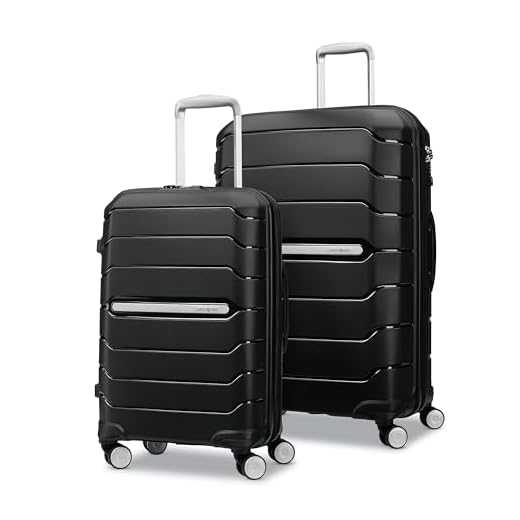


Quick verdict: many models from the brand will allow nesting, but compatibility is model-specific. Typical measurements to compare: carry-on ~22 × 14 × 9 in (56 × 36 × 23 cm); medium ~24–26 in (61–66 cm); large ~28–30 in (71–76 cm). Aim for minimum clearances of 0.8–1.2 in (2–3 cm) on width/depth and 1.2–2 in (3–5 cm) on height to clear wheels and shell taper.
Key factors that determine successful nesting: shell profile (tapered shells slide more easily), rigidity (hardshells are more predictable), wheel design (flush or recessed wheels reduce obstruction), handle recesses, and expansion zippers (expanded shells usually prevent insertion). Soft-sided pieces compress but external pockets and frames can block alignment.
How to verify before buying: measure external length, width and depth with the handle fully retracted and wheels attached; compare official dimensions and photos for recessed wheel wells; if possible, physically slide the smaller unit into the larger at a store. When measuring, allow the clearance margins above and inspect corner geometry where contact occurs.
Practical tips for storage and transport: store the larger on its back and slide the smaller gently into the cavity, protect shells with a soft cloth to avoid scratches, lock zippers without forcing, and remove accessories that protrude. Sets from the same product line are most likely to be compatible, but always confirm series specifications or test in person.
Nesting compatibility for this major hard-shell brand
Recommendation: buy matching-series hard-shell suitcases in incremental sizes and verify at least 3 cm clearance in length and width and 2–3 cm in depth between the smaller external footprint and the larger internal cavity before attempting to nest one case into a bigger one.
Measurement method: measure the smaller item’s external height with wheels retracted, maximum width across handles, and maximum depth (shell thickness). For the larger item measure internal usable cavity (open shell depth and internal height/width), subtract shell wall thickness and zipper overlap. Use tape measure precision to ±5 mm and record values side-by-side; proceed only when all three dimensions meet the clearance thresholds.
Compatibility checklist: confirm telescopic handle fully collapses flush; remove or fold external pockets, straps and detachable accessories; check wheel housings and hinge blocks for protrusions; avoid mixing different collections or production years because shell curvature and hinge positions often change between runs.
Storage technique and protection: place a thin microfiber or foam layer between shells to prevent abrasion; align wheel wells so they nest into vacant cavities rather than pressing on the opposite shell; store nested set on its side to distribute load across the largest surface; leave zippers slightly unsealed to relieve compression on seals.
Risks and savings: do not force nesting – excessive pressure can crack ABS/polycarbonate ribs or deform spinner mounts. Expect real-world storage volume reduction of roughly 40–60% for three-piece hardshell sets when properly nested; expandable or soft-sided pieces typically compress more but require different checks for zipper position and fabric stretch.
Measure shell dimensions and taper to predict nesting compatibility
Recommendation: allow a radial clearance of 8–12 mm around the perimeter and an axial clearance (overlap gap) of 12–20 mm; verify shell taper is ≤4° for reliable progressive entry when stacking smaller cases into larger ones.
How to measure accurately
Use digital calipers for rim widths and a tape measure for body dimensions. Record three external cross-sections of the smaller shell (mouth diameter Dm_small, mid-body diameter Dmid_small, maximum body diameter Dmax_small) and three internal cross-sections of the larger shell (inner mouth diameter Dm_large, inner mid-body diameter Dmid_large, inner max diameter Dmax_large). Measure axial distance from mouth to mid-body (L). Measure rim flange thickness and lip geometry; subtract flange when comparing clearances.
Calculate radial clearance per axis: Clearance_radial = Dinner − Douter − allowance_for_rim. Required condition for smooth nesting: Clearance_radial ≥ 8 mm on both width and depth axes. Compute taper angle (single-sided) as θ = arctan((Dmid_inner − Dm_inner)/(2·L)). For the smaller case, compute θ_small using outer diameters; for the larger case, compute θ_large using inner diameters. Reliable progressive entry usually requires θ_large − θ_small ≥ 0 (larger shell must not narrow faster than smaller shell) and both θ values ≤ 4°.
Worked example and pass/fail rules
Example measurements: small outer mouth Dm_small = 520 mm, small outer max Dmax_small = 560 mm, L = 120 mm. large inner mouth Dm_large = 534 mm, large inner max Dmax_large = 590 mm. Radial clearance at mouth = 534 − 520 = 14 mm → meets 8–12 mm guideline (treat 14 mm as acceptable but check for play). Radial clearance at max = 590 − 560 = 30 mm → more than sufficient.
Taper calculation: θ_small ≈ arctan((560 − 520)/(2·120)) = arctan(40/240) ≈ 9.46° (outer shell has pronounced taper). θ_large ≈ arctan((590 − 534)/(2·120)) = arctan(56/240) ≈ 13.1°. Since θ_large − θ_small ≈ 3.6° and both values are above 4° for θ_small, expect interference near mid-body; perform a physical trial or increase radial clearance at the mouth by trimming flange or allowing larger mouth aperture. Pass/fail rules: PASS if mouth clearance ≥8 mm and θ_small ≤4° and θ_large − θ_small ≥0; otherwise FAIL or marginal – require on-body test.
Identify handle, wheel and badge placements that block nesting
Recommendation: any external part protruding more than 10 mm (0.4″) from the outer shell will very likely prevent successful nesting; prioritize measuring handle housings, wheel pockets and decorative badges first.
Measurement steps
Use a caliper or steel rule to record three dimensions for each candidate obstruction: projection from shell, lateral width and mounting fastener height. Record values in millimetres and inches. Key thresholds to flag for correction: projection > 10 mm / 0.4″ (high risk), projection 5–10 mm (possible with tight clearances), projection < 5 mm (low risk). Wheel housings with depth > 15 mm / 0.6″ or wheel diameters > 70 mm / 2.8″ often force separation between shells. Telescopic-handle tubes that do not recess flush by at least 20 mm / 0.8″ will block entry of a smaller case.
Check mounting points from both sides of the shell: badge rivet heads, screw bosses and internal braces can add 2–8 mm of hidden thickness. Use a 1–2 mm paper shim to test minimum clearance around suspected areas.
Low-impact corrections and tests
Before permanent modification, perform these reversible checks: lock telescopic tube in fully closed position and push housing cover into place; rotate spinner wheels so axles sit in line with shell contour; remove or tape over external nameplates and zip-tie retractable handles down. For badges with exposed rivet heads, place a 3–5 mm adhesive foam strip beneath the incoming shell to test if that padding creates sufficient clearance.
If permanent change is acceptable: replace raised badges with flush decals, trim excess wheel-housing flange where plastic allows (file/file back & smooth), or relocate strap anchor points to inside surface. When altering fasteners, use countersunk screws or low-profile rivets and verify with the shim test described above. Always measure again after any modification; successful nesting requires cumulative clearance margins of at least 5–8 mm (0.2–0.3″) beyond measured protrusions to allow for shell taper tolerances and manufacturing variance.
Test nesting safely: step-by-step to avoid dents and scratches
Maintain a clearance of 12–20 mm between outer shells before attempting to place a smaller case into a larger one; increase that margin to 20–30 mm for aluminum-framed models or any rigids with exposed rivets.
Step 1 – Protect contact zones: apply 1.5–2 mm adhesive felt strips to the larger shell at probable touchdown points (rim, inner lip, latch housings). Use 3–5 mm EVA foam strips on the smaller case’s protruding edges. Secure with 25 mm painter’s tape so adhesive can be removed without residue.
Step 2 – Use temporary spacers for alignment: position 5–15 mm non-marking plastic shims under wheels and telescopic handles to prevent point contact during the first insertion. Place two small wooden blocks under the larger case to hold its shell at a stable angle of 5–10° for controlled lowering.
Step 3 – Controlled lowering and force limits: support the smaller case with two hands and lower it at a steady rate – do not apply more than 150 N (≈15 kgf) of downward force to any single edge while inserting; verify with a bathroom scale under the smaller case during the trial run. If resistance appears before the recommended clearance is reached, stop and reposition spacers or add padding.
Step 4 – Rubbing detection and short-cycle test: before removing spacers, run five slow insertion/removal cycles while watching for paint transfer, raised burrs or audible scraping. Mark high-pressure spots with removable painter’s tape or a soft pencil tip; after cycles, inspect with a 10x loupe for micro-scratches and depressions.
Step 5 – Long-term wear simulation: perform 20 rapid cycles at normal handling speed to simulate repetitive nesting; if any sanding, buckling of shell wall or deformation occurs, increase permanent padding to 3–5 mm felt or reconsider nested storage. Log cycle count and observed damage so decisions are evidence-based.
Step 6 – Final protectors and storage routine: install low-profile permanent guards (1–3 mm adhesive felt or slim plastic strips) at confirmed contact lines and cover both interiors with a microfiber cloth (300–400 gsm) before stacking. Wash removable textile liners and protective covers prior to use with a reliable machine such as best front load fully automatic washing machine to avoid grit that causes scratches.
Model pairs and series known to nest
Recommendation: Prioritize same-series size sets – 20″, 24″, 28″ versions from the same family are the most reliable candidates for telescoping one into another.
Reliable within-series combinations
Cosmolite (polypropylene curved-shell): 20″ → 24″ → 28″ size progression reliably telescopes because shell taper and wheel/handle placement are consistent across sizes. Lite‑Shock (thin-curved composite): same-size progression nests across the three core dimensions; expect tighter clearance due to ultra-light construction. FreeForm / Freeform hard-shell line: 20→24→28 sizes designed with matching rim profiles, good for stacking one inside the next. S’Cure (ribbed polypropylene): 20, 24, 28 models share wall thickness and rim geometry and therefore nest predictably. Winfield 3 DLX / Winfield 3: the three common sizes share uniform shell taper; internal overlap tends to be larger than in curved-shell lines, giving easier insertion.
Cross-series combos that often work – and when they don’t
Common cross-family pairs that frequently succeed: Winfield 3 (smaller) into Omni PC (medium) or Winfield 3 into S’Cure medium when the smaller shell is a carry-on and both are hardside polycarbonate/polypropylene with external wheel housings of similar profile. Lite‑Shock (smaller) into Cosmolite (medium) can work because both use curved shells, but only when model generations share the same wheel/handle mounting layout.
Failure modes to watch for with cross-series pairing: generation updates that change shell curvature, shifted wheel housings or corner bumpers, and models that add external trims or thicker rim lips. Verify SKU/generation codes printed on the tag: identical series but different production runs may alter geometry enough to prevent nesting.
Practical rule: same-family consecutive sizes are the first choice; cross-family pairing is acceptable only after comparing external heights (approximate external heights: 20″ ≈ 55–56 cm, 24″ ≈ 64–66 cm, 28″ ≈ 76–78 cm) and visually confirming wheel/handle placement match.
Load and secure nested pieces for trunk or closet storage
Place the smallest hard-shell case into the largest with wheels and handle housings aligned, pad contact zones with 3–6 mm microfiber or closed-cell foam, maintain 12–25 mm (0.5–1 in) rim clearance, and fasten the set with a 25–50 mm (1–2 in) adjustable strap at midline.
Trunk procedure (quick checklist)
- Lay a non-slip trunk liner under the stacked set to prevent lateral movement.
- Position the nested set against the rear bulkhead or seatback so the stack cannot slide forward under braking.
- Use a 25–50 mm cargo strap routed around the stack and hooked to factory anchor points; tension until the set is immobilized but not compressed (avoid visible shell deformation).
- Place 25–50 mm closed-cell foam blocks or folded towels at wheel housings and corners to absorb vibration and prevent rim-to-rim contact.
- Keep heavy cargo off the top of the set; recommended additional vertical load on the stack: maximum 15 kg (33 lb).
- Stow removable accessories (wheel guards, zip pouches) separately in a soft tote or trunk pocket to avoid abrasion.
Closet or shelf procedure (secure storage)
- Store nested set horizontally on a shelf with a 5–10 mm breathable pad between shells to stop scuffing.
- If storing upright, set on wheels with handles fully retracted and locked; place a rubber mat under wheels to protect the shelf floor.
- Wrap the nested assembly in a breathable dust cover or cotton bag; insert 2–3 silica gel packets to control humidity.
- Limit vertical stacking of nested assemblies to one set per pile; more than two sets stacked risks permanent deformation of polycarbonate or ABS shells.
- Label the outer cover with contents and size to speed retrieval and reduce unnecessary handling.
- Handle and wheel prep: fully retract telescoping handles, engage handle lock, set wheels so treads do not press against shell walls; use foam wedges (25–40 mm) to keep treads off contact points.
- Packing inside: place soft items (totes, pouches) into the inner cavity to support shape; recommended filler thickness at corners 10–20 mm. For compact gear ideas see best travel totes bags for women.
- Accessory recommendation: keep a compact umbrella alongside stored sets for quick access – see best selling umbrella in england.
Final checks: tug on straps, test for lateral play, verify no pressure points on shell contours, and re-check after the first 24 hours of storage; retension straps if slight settling occurs.


