Choose durable material that can withstand wear and tear. Vinyl is an excellent option due to its water-resistant properties and availability in a variety of colors. Look for a heavy-duty type that provides both structure and flexibility.
Gather necessary tools and supplies: scissors, a ruler, a cutting mat, strong adhesive or sewing machine, and hardware like straps and clasps. A solid workstation will streamline the process and ensure precision in cutting and assembling the components.
Design the layout before cutting. Sketch a blueprint, including dimensions for the main compartment, pockets, and straps. This step ensures all pieces fit together seamlessly. Incorporate functionality with pockets for organization, accommodating items such as notebooks, devices, and personal belongings.
Cut the pieces according to the design. Ensure clean edges for a polished look, as vinyl can fray if not handled correctly. Begin assembling the body by joining the primary sections using adhesive or by sewing, maintaining straight seams for durability.


Finish with hardware attachment. Straps should be secure, providing comfort while carrying. Consider adding additional features like a flap for extra protection and style, ensuring the final product meets both aesthetic preferences and practical requirements.
Choosing the Right Vinyl Material for Your Creation
Opt for high-quality PVC for durability and water resistance, ensuring your carrier withstands various weather conditions.
Consider thickness; 600D to 900D options provide strength, while lighter weights offer flexibility. Evaluate your use case carefully:
- For everyday use, a medium thickness is ideal.
- For heavy-duty applications, choose thicker options to minimize wear.
Texture impacts aesthetics and grip. Smooth finishes are slick and easy to clean, while textured surfaces offer better grip but may require more maintenance.
Pay attention to color and pattern. Solid hues are classic and versatile, while bold prints push creativity. Ensure they complement your style.
Check for eco-friendly certifications if sustainability is crucial. Materials made from recycled plastics reduce environmental impact.
Finally, price can be a guiding factor. Investing in premium brands often leads to better performance, but there are affordable alternatives that maintain quality.
For further adventures in practicality, explore the best backpack leaf blower for the money.
Required Tools and Supplies for Construction
Gather the following items to ensure a smooth process when creating your custom carry-all. A cutting mat acts as a protective surface for your work area, while a rotary cutter allows for precise cuts through heavy material. Strong scissors are also useful for minor adjustments. A reliable sewing machine capable of handling thicker fabrics will be crucial; ensure it has a walking foot attachment for even feeding.
Key Supplies
Opt for high-quality threads specifically designed for durable fabrics. Heavy-duty needles are necessary for the best results. Keep a supply of D-rings and straps on hand to create adjustable components. For added structure, consider using interfacing or foam padding, which can enhance the overall appearance and functionality of your item. Additionally, waterproof fabric glue can help with non-sewing sections.
Additional Tools
Invest in a ruler and tailor’s chalk for precise measurements and markings. A clear acrylic ruler can assist in cutting straight lines. Ensure to have clips or pins for holding layers together while assembling; these will be vital for accurate sewing. Finally, for those who wish to document their work, having the best digital camera for 1080p handy will allow for high-quality images of the finished piece.
Measuring and Cutting Vinyl Panels Accurately
Begin with precise measurements; use a tape measure to determine the dimensions needed for each section. Mark each measurement clearly with a fabric marker or chalk for visibility. Ensure to consider seam allowances–typically around 1/4 inch–to avoid discrepancies in final dimensions.
Tips for Accurate Measurements
For complex shapes, create a pattern using lightweight paper or cardboard. This approach allows for adjustment before cutting into the material. Always measure twice to confirm accuracy. If using a rotary cutter, employ a cutting mat and straight edge to maintain clean lines.
Cutting Techniques
When cutting, use sharp scissors or a rotary cutter designed for thick materials. Ensure a flat, stable surface for optimal control. Avoid stretching the panels while cutting; this can alter their shape. Practice cutting techniques on scrap pieces if unsure, ensuring smoother execution on final panels. Always wear protective gloves when handling sharp tools.
After cutting, inspect edges for any rough spots. A heat sealing tool can smooth edges, preventing fraying over time.
Sewing techniques for assembling the bag
Employ a straight stitch combined with a 1/4 inch seam allowance for joining panels. This ensures durability while maintaining a neat appearance. Use a walking foot to manage thick layers and reduce slipping, especially with materials prone to shifting.
Reinforcement and finishing
Incorporate double stitching at stress points, such as corners and where straps attach. This adds strength and provides a polished finish. Consider using bias tape along raw edges for a professional look; it also helps prevent fraying.
Hardware installation
For attaching buckles or snaps, create small slits instead of large holes, preserving the integrity of the fabric. Use a hammer and a setter to secure rivets without damaging the material. For precision, mark all hardware placements before sewing to ensure alignment.
For a related construction accessory, refer to the best backpack for construction workers. This can offer insights into reinforced designs that complement the project.
Adding straps and closures for functionality
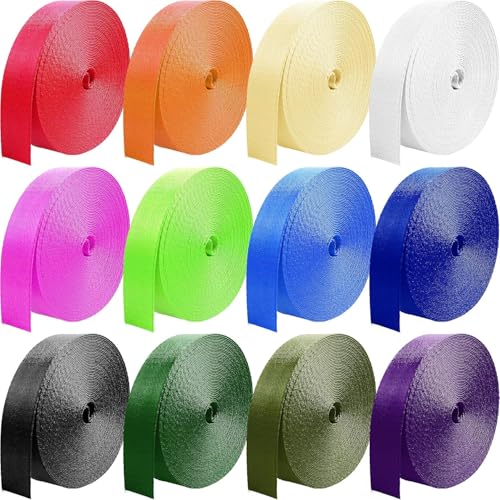
Use durable materials for straps, such as nylon webbing or cotton canvas, to ensure they withstand wear and provide comfort. Cut the straps to a suitable length based on your desired carrying style–crossbody or shoulder. For adjustable straps, consider utilizing metal sliders to allow length modification.
Attachment methods
Sew straps directly onto the body of the accessory for a permanent solution, or opt for removable attachments using snap hooks or D-rings, which allow you to switch up the look or function as needed. Reinforce stitching at strap attachment points to enhance durability.
Closure options
Different closure types enhance storage security. Magnetic snaps provide ease of use while maintaining a sleek appearance. Zippers offer a more secure option, especially for valuables, but ensure that the zipper operates smoothly and matches the overall aesthetics. Velcro can be a quick and cost-effective alternative for closures where flexibility is essential.
Test your closures before final assembly to confirm they work as intended, ensuring both accessibility and reliability in daily use.
Customizing Your Carrier for Personal Flair
Incorporating unique elements is the best way to express individuality. Start by considering fabric paint or markers to add your own designs or choose a stenciling method for intricate patterns. Fabric paints are ideal, as they allow for detailed artwork while maintaining flexibility.
Embellishments and Accessories
Add patches or pins that resonate with your style. Iron-on patches simplify decorating, while sewing allows for more secure placements. Incorporate decorative stitching using contrasting thread for a chic touch. Consider adding hardware like studs or eyelets, which enhance durability and add a visual focal point.
Color Coordination and Themes
Select colors that reflect your personality. Use multiple shades to create a gradient or multi-color effect. Coordinate with your wardrobe or choose a theme, like retro or nature-inspired, to guide your customization choices.
| Customization Method | Description |
|---|---|
| Fabric Paint | Apply designs and patterns directly onto the surface. |
| Patches | Add visual interest with messages or images. |
| Decorative Stitching | Use contrasting thread to highlight seams. |
| Hardware | Add studs or eyelets for durability and style. |
Experiment with different elements until you find the combination that truly defines your aesthetic. Personalizing your carrier ensures it stands out and speaks to your character.
FAQ:
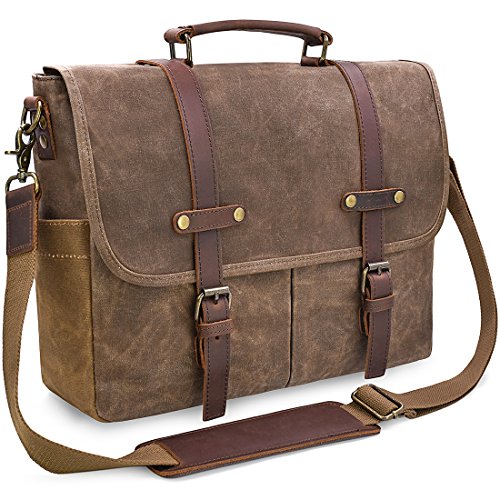
What materials do I need to make a vinyl messenger bag?
To create a vinyl messenger bag, you will need several key materials: vinyl fabric, which is durable and waterproof; a sturdy canvas or nylon for the lining; heavy-duty thread suitable for sewing vinyl; a sewing machine with a strong needle, such as a walking foot or jeans needle; closure components like snaps, velcro, or zippers; straps, which can be made from nylon webbing or matching vinyl; and optionally, additional hardware like D-rings for attaching the straps.
Can I sew a vinyl messenger bag by hand, or is a sewing machine necessary?
While it is technically possible to sew a vinyl messenger bag by hand, using a sewing machine is highly recommended. Vinyl can be quite thick and challenging to sew by hand, making it difficult to achieve clean, even stitches. A sewing machine allows for more precision and strength, especially when working with heavier materials. If you do not have access to a sewing machine, consider borrowing one from a friend or using a local sewing studio that offers machine rentals.
What steps are involved in making a vinyl messenger bag?
The process of making a vinyl messenger bag typically involves several steps. First, you will need to create a pattern and cut your vinyl and lining materials to the desired size. Next, sew the main body of the bag together, ensuring to reinforce seams for durability. You can then attach any additional pockets or features, followed by sewing the lining to the inside of the bag. After that, attach the closure mechanism and any straps or handles. Finally, make any finishing touches, such as trimming excess threads and ensuring all components are secure. It’s a rewarding project that can be customized to fit your style and needs!