


Quick guidance: opt for synthetic shells labeled DWR (durable water-repellent) plus a laminated inner layer. Look for fabrics with hydrostatic head ratings: ~1,500 mm handles light drizzle, ~5,000 mm suits steady rain, 10,000+ mm recommended for prolonged exposure. Higher denier (e.g., 500–1000D) boosts abrasion resistance but increases weight.
Seam treatment matters as much as fabric. Taped or welded seams prevent stitch-hole leakage; untreated stitched seams will wick water under sustained exposure. Zippers with water-resistant coatings (examples: AquaGuard-style) plus external storm flaps cut the most common entry points. Closure types: roll-top and storm-flap systems outperform exposed coil zippers during heavy showers.
Real-world performance: standard water-resistant packs withstand downpours and splashes but usually fail under full submersion unless specifically rated for that use. To protect electronics and paperwork, use an internal dry bag or sealed pouch rated for immersion. For added protection, deploy a separate rain cover with a hydrostatic rating above 10,000 mm and taped seams.

Maintenance and selection checklist: 1) verify fabric coating (PU/TPU) and listed hydrostatic rating; 2) confirm taped/welded seams; 3) check zipper type and presence of storm flap; 4) prefer roll-top or flap closures for wet climates; 5) plan for a dedicated dry bag for valuables. Routine care: reapply DWR with a manufacturer-compatible spray or wash-in treatment, clean salt and dirt, inspect and reseal seams with silicone-based seam sealer when leakage appears.
Rain-resistance assessment for lightweight rucksacks
Recommendation: select models with a PU- or TPU-coated nylon/polyester shell, welded or taped seams, and water-repellent (DWR) treated fabric combined with sealed zippers or roll-top closure for reliable protection in prolonged rainfall.
Materials and ratings: expect hydrostatic head (water column) figures expressed in millimetres. Rough guidance: 1,000 mm – minimal splash resistance; 3,000–5,000 mm – suitable for heavy showers and short exposure; 10,000 mm and above – suitable for extended wet conditions and moderate immersion risk. TPU-laminated fabric and PVC tarpaulin consistently show higher mm-values than untreated woven textiles.
Closures and seams: external zippers with storm flaps reduce leakage versus exposed zips; fully welded seams eliminate needle holes and therefore reduce through-seam seepage. Roll-top seals paired with a welded base typically outperform top-loading zippacks in laboratory soak tests and field use.
Hardware and reinforcement: taped seam width and quality determine long-term durability; polyurethane-coated webbing resists capillary wicking at shoulder and handle junctions better than untreated cotton webbing. For high-humidity use, look for corrosion-resistant metal or high-grade polymer buckles to prevent failure under load.
Maintenance and testing: restore DWR every 6–12 months with aerosol or wash-in treatments, clean zippers and re-lubricate with silicone-based lubricants, and inspect seam tape for lifting. Quick field check: place gear inside, pour ~1 L of water over critical seams and closures for 30–60 seconds, then inspect for damp spots.
Use-case recommendations
Commuting with electronics: aim for ≥3,000 mm rating plus sealed zippers or an internal dry bag. Multi-day trekking in persistent rain: target ≥10,000 mm, welded seams, roll-top closure and consideration of an external rain cover with taped seams. For DIY raincover fabrication or repairs involving PVC components, consult this step by step guide connecting an air compressor to pvc pipe.
Final practical tip
When evaluating a model in-store, perform a hands-on check: press along seams and zipper channels with a damp cloth; if moisture migrates through within a minute, upgrade to a model with taped/welded seams or use supplemental dry storage for valuables.
Water resistance of common materials used in rucksacks
For regular commuting choose 600D polyester with a PU coating and taped seams (target hydrostatic head 1,500–3,000 mm); for prolonged wet exposure select 1000D Cordura or TPU-laminated nylon with welded seams (target HH ≥10,000 mm).
1000D/500D Cordura (nylon): abrasion-resistant, low porosity. Typical factory finishes: PU (polyurethane) or TPU lamination. PU unlaminated fabrics often rate ~1,500–4,000 mm HH; TPU-laminated variants commonly exceed 10,000 mm. Stitched seams reduce practical resistance unless seam tape or welding is applied.
Polyester (200D–600D): lighter and cheaper. 600D polyester + PU coating gives acceptable protection for light showers (≈1,500–3,000 mm HH). Higher-denier polyester with double coatings can approach 5,000–8,000 mm but gains weight. Polyester absorbs less stretch than nylon but ages faster under UV.
TPU/PVC tarpaulin and vinyl: field HH values frequently >20,000 mm when welded; ideal for heavy downpours and ground contact. Downsides: bulk, weight, poorer breathability, and louder material noise. Choose welded construction and roll-top closures for best liquid exclusion.
Waxed cotton / canvas: water rejection relies on surface wax rather than HH testing. Short showers bead off well after waxing; sustained rainfall soaks through faster than laminated synthetics. Maintenance: reapply paste wax or hot wax rub annually or after heavy use to restore repellency.
Durable water-repellent (DWR) finishes: factory DWR (fluorocarbon or PFC-free alternatives) maintains surface beading but does not stop pressurized water. Expect performance drop after 6–12 months of regular use; refresh with spray-on or wash-in products (Nikwax Tech Wash + TX.Direct or Grangers Performance Repel) and follow product-specific heat activation instructions only if manufacturer allows.
Closure and seam details matter at least as much as fabric HH. Stitched seams are common failure points–look for taped seams, welded seams, or internal seam seal tape. Zippers: water-resistant coated zips (e.g., YKK AquaGuard) plus an external storm flap reduces leakage; exposed zipper teeth with no flap will admit water even with a high-HH shell.
Quick selection checklist: 1) check stated hydrostatic head (HH) or manufacturer millimeter rating; 2) prefer welded/taped seams for high exposure; 3) pick TPU or laminated nylon for sustained rain, PU-coated polyester for light showers; 4) verify zipper type and presence of storm flap; 5) plan maintenance (DWR refresh, wax reapplication) based on material. For models tailored to performers and stage pros see best backpack for dancers.
How to perform a simple home water test on this pack
Perform a two-stage liquid ingress check: a targeted drip/spray assessment, then a short shallow-immersion probe to reveal seams, zippers and coatings that fail under real conditions.
Required items: kitchen scale (±1 g), measuring cup (100–500 mL), food coloring, stopwatch, soft white paper towels, clear plastic bin (10–15 cm deep), small screwdriver or toothpick for seam inspection, and a towel for drying.
Step 1 – Drip/spray assessment (5–10 minutes): place a folded white paper towel inside the main compartment and close all flaps as normally used. From a height of 15–20 cm, pour 100 mL of water mixed with two drops of food coloring along the main zipper and around stitch lines over 60 seconds. Wait 2 minutes, open and inspect the paper towel and inner fabric.
Pass criteria: no colored dampness on towel; no wet streaks on inner lining. Fail signs: colored transfer, visible damp patches, or water pooling at seams.
Step 2 – Shallow immersion probe (total 2 minutes): weigh the empty pack (W0). Place it upright in the plastic bin so water reaches 6–8 cm up the exterior (covering base and lower seams). Hold submerged position for 30 seconds, then remove and drain for 10 seconds. Reweigh (W1).
Evaluation by mass change: acceptable ≤ 10 g gain; marginal 11–30 g (use internal dry bag for electronics); fail >30 g (external protection required). For models with internal foam or multiple pockets, accept lower threshold (≤5 g).
Step 3 – Zipper and seam spot check (3–5 minutes): after immersion, dry the exterior with a towel and press a clean paper towel against zipper closures and stitched joins for 20 seconds. Any transfer of colored moisture indicates capillary leakage along thread or zipper tape.
Repeat tests on wet seams: apply a bead of clear seam sealer to failed areas, retest after 24 hours. If repeated sealing is required across large areas or multiple seams, prefer secondary protection (dry sacks) or consider professional transport options such as the best luggage sending service for items that must stay dry during transit.
| Test | Procedure | Duration | Pass metric | Tools |
|---|---|---|---|---|
| Drip/Spray | 100 mL colored water along zipper and seams | 60 s pour + 2 min check | No colored damp on inner paper | Measuring cup, food coloring, paper towel |
| Shallow immersion | Submerge base to 6–8 cm for 30 s, drain 10 s, weigh | ~1 min handling | Mass gain ≤ 10 g (≤5 g for lined packs) | Bin, scale, stopwatch |
| Zipper/seam spot | Press paper towel to seams after wetting | 20 s per spot | No colored transfer | Paper towel, tweezers/toothpick |
If any test fails, protect valuables with sealed inner pouches or replace the unit. Small failures can often be fixed with seam sealer or zipper lubricant; large-scale seepage requires alternative carrying solutions or professional handling for shipments as indicated above.
Identifying water entry points: seams, stitching and closures
Recommendation: Inspect every seam, stitch row and closure before use – check stitch density (<6 stitches per inch indicates high leak risk), seam tape adhesion, zipper coating integrity and storm-flap overlap (minimum 25 mm) and repair or reinforce weak points prior to exposure.
Visual and tactile indicators
Look for needle holes, puckering, separation of seam allowance, raised tape edges and rust or white salts on thread. Run a fingertip along seams; a continuous gap ≥1 mm or any channeling where water can track equals a definite entry path. For stitched attachments (shoulder straps, webbing), inspect both faces: backside thread abrasion or thread fraying suggests imminent breach. Zippers: inspect the tape-to-coil bond and the coating on the tape; any cracking, peeling or stiff sections reduce resistance to moisture. Metal rivets and snaps will show corrosion or dark staining around the hole – these are penetration points unless sealed.
Targeted diagnostics and quick tests
Localized press-test: place an absorbent paper towel inside the compartment and spray or pour 50–100 mL of water at the seam for 30–60 seconds while keeping the bag upright; examine towel for pinpoint wet spots and trace lines. Flashlight check: with the interior empty, shine a strong light along seams and closures from outside – light leakage reveals needle holes or gaps. Stitch-count test: measure stitches per inch (SPI) over a 2-inch span; 9 SPI = better. Tape-lift threshold: if seam tape lifts more than 10 mm under light peeling, it will fail under sustained moisture.
Repairs and temporary mitigations: apply a flexible silicone seam sealant (follow cure time on product label) to stitch lines for small leaks; press-on seam tape designed for coated fabrics restores factory-level resistance where adhesive remains intact; install a zipper storm flap with ≥25 mm overlap for exposed zippers; replace metal snaps with sealed plastic grommets or cover snaps internally with a bonded washer and seam sealer. For sewn-on hardware, add an internal backing patch (minimum 40 x 40 mm) bonded with contact adhesive and sealed around the stitch perimeter.
Applying water‑repellent spray and seam sealer to rucksacks and daypacks
Use a fluorocarbon‑free durable water‑repellent (DWR) spray for fabric faces and a flexible polyurethane or acrylic seam sealer for stitch lines; match product chemistry to the exterior fabric/coating and allow full cure before exposing the pack to heavy precipitation.
Materials and compatibility
- Uncoated nylon or polyester: fluorocarbon‑free DWR spray + acrylic/PU seam sealer.
- PU‑coated fabrics (visible dull finish): use DWR products labeled safe for PU and a seam sealer specified for PU coatings.
- TPU or silicone‑coated fabrics: most liquid seam sealers will not bond; prefer manufacturer seam tape or silicone‑compatible sealants; test first.
- Waxed cotton/canvas: re‑wax only; do not use conventional DWR sprays or solvent seam sealers.
- Leather trim: use leather conditioners/water repellents only; avoid solvent sealers on leather.
- Recommended product types: fluorocarbon‑free spray DWRs (e.g., water‑based formulas), polyurethane or acrylic seam sealers, heat‑activated seam tape for torn taped seams.
Step‑by‑step application
- Clean: remove dirt and oils. Machine wash cold with technical cleaner or hand wash with mild detergent; no fabric softener. Fully air dry 12–24 hours.
- Workspace: ventilated area, temperature 10–25°C, relative humidity below ~60% for best cure.
- Protect: mask zippers, webbing and painted logos with low‑tack tape to avoid buildup.
- Apply DWR spray:
- Hold can 15–25 cm from fabric; apply even mist in overlapping passes to avoid puddles.
- One thin coat usually suffices; for worn fabrics apply a second light coat after 5–10 minutes.
- Allow 24 hours cure; optional low heat activation (tumble on low 10–15 minutes or warm iron through cloth) only if fabric and manufacturer permit.
- Seal seams:
- Use a narrow‑tip applicator or brush. Push sealer into stitch lines on the exterior and interior if accessible.
- Remove excess with a rag dampened with the manufacturer’s recommended solvent (if allowed) before it skins over.
- Cure time: minimum 24–48 hours at room temperature; full mechanical strength may take 72 hours.
- Taped seam repair: replace failed tape with heat‑activated seam tape per tape instructions; if unsure, have a gear repair shop perform the task.
- Final check: run a focused spray test (short burst from a hose) after cure; inspect interior for leaks and reapply sealer to any seepage points.
- Reapplication cadence: spray DWR when surface no longer beads (commonly after 10–20 machine washes or 1–2 seasons); seam sealer typically lasts multiple seasons unless seams flex heavily.
- Quantities: one standard 200–300 ml spray can treats 1–2 m²; seam sealer tubes (25–60 ml) repair multiple seams–buy slightly more than estimated.
- Safety: use gloves, eye protection and a respirator when using solvent‑based sealers; keep away from open flame; ventilate.
- Troubleshooting: flaking or peeling indicates chemical incompatibility–strip treated area with a mild detergent and retest with a compatible product; cracking suggests over‑application or inflexible sealer–use a more flexible formulation.
Packing methods to keep electronics and papers dry in wet conditions
Use a nested protection system: place each device or document in a device-sized roll-top dry sack (recommended volumes: 1–3 L for phone/passport, 8–10 L for tablet, 20–30 L for a 15″ laptop), then insert that sack into a heavy-duty freezer-grade zip bag (gallon size for small items, 2–3 gallon for laptops) and finally put the assembly inside the main pack compartment lined with a 3–4 mil contractor trash bag.
Electronics procedure: remove batteries when possible; wrap circuit boards and open ports in a small anti-static resealable bag; slide the device into a neoprene sleeve or thin foam case to prevent internal movement; add silica gel: 10 g per small device, 25–50 g for laptop/tablet. Seal the neoprene sleeve inside the roll-top sack, evacuate excess air, roll the top three tight turns and clip.
Paperwork procedure: use clear polypropylene archival sleeves (A4/letter size) for each document, then place 2–3 sleeves stacked between a rigid backing (thin plastic or cardboard) to avoid creases. Place this assembly inside a double zip-lock: first a single-seal document sleeve, then a freezer bag. For multi-page sets, include 15–30 g silica gel per packet to limit humidity transfer.
Sealing and redundancy techniques
For roll-top sacks: roll the cuff three full turns, feed the ends through the buckle and tension until folds compress. For zip bags: press out air, close once, slide a binder clip across the seal, then fold the excess and secure with packing tape across the seam for a secondary barrier. Use two independent seals for high-risk conditions (e.g., one roll-top + one zip bag or two stacked zip bags).
Hard-case option for sensitive gear: use a crush-resistant case with an IP rating (look for IP67/IP68 stamped on cases or spec sheets – IP67 = protected against immersion to 1 m for 30 min; IP68 = specified higher depth/time). Mount foam inserts shaped to the device to eliminate movement-induced stress and add 25–50 g desiccant per case.
Practical daily-use tips
Keep frequently used items (phone, papers) in a quick-access zip pouch lined with a thin plastic liner; when expecting heavy rain, transfer essentials into the nested protection described above. Label each sealed bag with a waterproof marker and include a small silica gel replacement schedule: swap sachets every 3–6 months in humid climates or after any wet exposure. Store chargers and cables separately in a small sealed pouch to prevent corrosion of contacts.
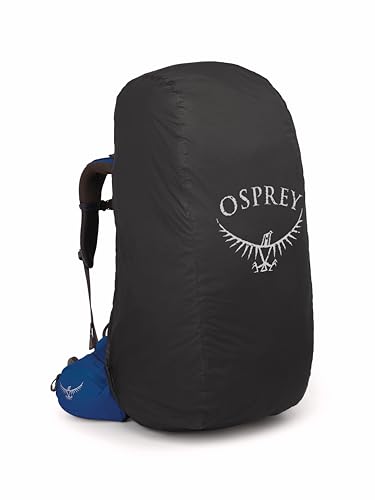
Choosing between a rain cover, dry bag, or sealed replacement
Choose a rain cover for light showers and short trips, a roll-top dry bag for river crossings or protecting electronics inside a day pack, and a fully sealed replacement pack with welded seams and laminated fabric for frequent heavy exposure, sea spray or submersion risk.
- Rain cover – when to pick
- Best for intermittent exposure: drizzle, short downpours, or muddy trails.
- Material: silicone- or PU-coated ripstop nylon with a hydrostatic head (HH) of 1,000–3,000 mm; higher HH gives longer protection in sustained rain.
- Size guideline: select a cover 20–40% larger than pack volume to accommodate hip belts and external pockets.
- Advantages: 40–120 g, folds to pocket the size of a phone, inexpensive ($10–$40).
- Limits: seams and closure gaps around harness remain exposed; not suitable for immersion or prolonged wetting.
- Dry bag – when to pick
- Best for internal gear protection when straps, zippers or seams of the outer pack are suspect, or when crossing rivers/kayaking.
- Closure: roll-top with at least three full rolls plus buckle clip; a mis-rolled top is the most common failure mode.
- Materials: TPU-laminated nylon or PVC (200–1000D). TPU offers lighter weight and no-offgassing; PVC is rugged and cheaper.
- Performance: properly rolled and clipped dry bags commonly meet IPX7-like protection (1 m/30 min); continuous submersion testing requires rated dry boxes or welded-seam systems.
- Volume choice: 5–10 L for camera/electronics, 20–35 L for clothing and spare shoes, 50+ L if replacing main pack liner.
- Advantages: positive buoyancy on small sizes, multi-use as internal liner or standalone carrier.
- Sealed replacement pack – when to pick
- Best for daily heavy rain, coastal use, whitewater environments, or professional needs where built-in protection and quick access are required.
- Key features: welded/taped seams, laminated fabrics (e.g., TPU 200–1000 µm), welded internal pockets, and laminated or bonded zippers (water-resistant sliders) with external storm flaps.
- Performance targets: look for lab data or specs – HH ≥ 10,000 mm and zippers specified for splashes/submersion; manufacturer submersion tests (e.g., 1 m/30 min) are useful.
- Trade-offs: heavier and more expensive ($150+), less breathable, fewer organizational pockets unless specially engineered.
- Maintenance: flush salt and sand after marine use; avoid sharp folds that crease laminate layers; repair kits for welded seams are limited to specialized patches.
Decision checklist (tick items relevant to your use):
- Exposure level: light rain / heavy rain / sea spray / possible immersion
- Access frequency: need quick access to items while wet?
- Weight & packability limit: ultralight vs robust kit
- Internal protection: will you use internal dry bags or a single liner?
- Budget and repairability: cheap replaceable covers vs long-term sealed systems
Quick combos that work:
- Commuter in city: small rain cover + internal 3–5 L dry pouch for electronics.
- Day hike with river crossings: 10–20 L dry bag for clothes and electronics; use standard day pack as outer carrier.
- Multi-day trekking: sealed replacement pack if frequent storms and wet camps are expected; otherwise use large dry liner + rain cover.
- Sea kayaking/whitewater: dedicated dry bag or welded pack rated for submersion; double-bag valuables (small electronics) inside a 1–2 L dry pouch.
Practical tips:
- Test roll-top technique at home: three full rolls + buckle; then submerge mouth briefly to check for leaks.
- Match cover size to actual packed dimensions including hip belt and top lid; a tight-fit cover reduces flapping and wear.
- For electronics, use a hard-case dry box for underwater exposure; soft dry bags protect from rain but not repeated submersion impacts.
- Replace a cover or liner that shows delamination, salt crusting, or cracked coating; repairs on laminated fabrics are finite.
FAQ:
Are open story backpacks waterproof?
Most open story backpacks are not fully waterproof. They often use plain fabric or light coatings that repel light rain but let water through at seams, zippers and open tops. If you need full protection for electronics or papers, choose a model made from laminated fabric with welded seams and a secure closure, or pack sensitive items in a dedicated dry bag or waterproof pouch inside the pack.
Which materials and construction features increase water protection for an open story backpack?
Materials that resist water include TPU- or PVC-laminated nylon, heavy-duty coated nylon, and waxed canvas treated with a durable water repellent. Construction details that matter are welded or taped seams (rather than stitched seams), waterproof zippers or zipper flaps, and closures that reduce exposure, such as roll-tops or storm flaps. A quality lining and internal pockets also help keep moisture away from valuables.
Can an open story backpack handle heavy rain or being briefly submerged?
A backpack described as “open story” will usually handle light rain, but heavy downpours or submersion are likely to let water in through closure points and seams. Brief splashes may be okay if the outer fabric is coated, but plunging the bag underwater will let water enter unless the design is fully sealed and rated for submersion. For kayak trips, whitewater, or river crossings, use a true waterproof bag or dry sack instead of relying on a standard open-top pack.
How can I check whether my open story backpack is water-resistant or waterproof at home?
First, inspect tags or product specs for terms such as “waterproof,” “water-resistant,” hydrostatic head rating, or mention of welded seams. Examine seams and the zipper area for tape or welding. A simple at-home check: place a sheet of dry tissue or a paper towel inside an empty pack, then spray or pour a small amount of water on the exterior and wait a few minutes. If the paper stays dry, the pack offers decent protection for light rain; if it gets damp, count on additional protection for valuables. For definitive info, contact the maker or look up the exact model’s specifications.
What care and accessories improve water protection for an open story backpack?
Keep fabric treatments effective by cleaning the bag according to the manufacturer’s instructions and reapplying a water-repellent spray when the finish begins to bead poorly. Repair or reseal damaged seams with a seam sealer designed for the material, and replace worn zipper covers if possible. Use an external rain cover or internal dry bags for electronics and documents when forecasts predict heavy rain. Store the backpack dry and ventilated after use to avoid breakdown of coatings and mold growth.


