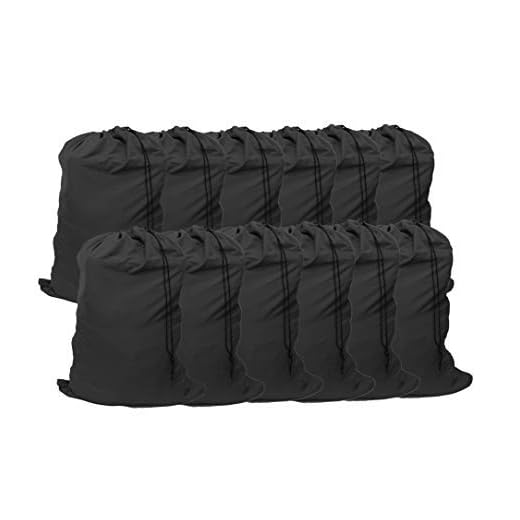

Hand-wash recommendation: submerge the empty daypack in cool water (≤30°C) with 1–2 teaspoons of pH-neutral detergent per 4 liters; gently agitate by hand for 3–5 minutes, concentrating on stained areas with a soft-bristled brush. Remove detachable straps, internal frames and the laptop sleeve before soaking; check the sewn-in care label–if it explicitly permits a machine cycle, place the item in a mesh laundry bag and run a cold, gentle spin with no high-speed extraction.
Spot treatment protocol: mix 1 part white vinegar to 4 parts water or use a mild liquid soap to pre-treat oil and grime; apply with a microfiber cloth, working from the fabric edge toward the stain center, wait 5–10 minutes, then rinse with cool water. Do not use chlorine bleach, fabric softener or harsh solvents; always test any stain remover on an inconspicuous seam before wider application.
Rinse and drying method: rinse until suds are fully gone, press excess water out using absorbent towels–avoid wringing or twisting welded seams or foam-padded panels. Reshape the item and air-dry hung upside-down in shaded, well-ventilated space; expect 12–24 hours for most synthetic constructions. Avoid tumble drying, direct heat sources or prolonged sun exposure that can fade pigments and degrade water-repellent finishes.
Maintenance and odor control: neutralize interior smells by sprinkling 60–120 g (¼–½ cup) baking soda, leave 12–24 hours, then vacuum or shake out. Lubricate metal zippers with paraffin wax or a zipper-specific lubricant; for leather trim, wipe with a slightly damp cloth and apply a small amount of leather conditioner sparingly. If water no longer beads, restore the durable water-repellent coating with a wash-in or spray-on DWR product following that product’s instructions.
Care cadence: spot-treat visible marks immediately, perform a light hand-wash every 6–12 weeks with regular daily use, and a deeper refresh twice per year for heavy-duty use. Store the carryall empty and dry between outings to limit odor buildup and fabric wear.
Identify care label and fabric type to select the correct washing method
Immediate rule: if the sewn tag permits machine washing, use cold water (≤30°C / ≤86°F), gentle cycle, mild liquid detergent and a mesh bag; otherwise use spot treatment or hand laundering only.
Read the label data
Check for symbols and text: temperature (°C/°F), bleach icon (crossed means no chlorine), tumble-dry instructions, and any “do not submerge” or “dry clean only” notes. A printed tag with “gentle” or a hand symbol means surface or hand washing only; a machine-tub icon without an X allows machine laundering as per the temperature shown.
Match method to material
Nylon: machine-safe in most cases – cold water, gentle cycle, no heat drying; remove loose inserts and fasten hardware. Polyester: similar to nylon but resists wrinkles; avoid high heat and fabric softeners. Heavy cotton (cotton duck): prone to shrinking and dye run – pre-test a hidden seam for colorfastness, treat oil with dish soap, use warm water for stubborn stains only, then air-dry to prevent shrinkage.
Missing or unreadable tag: perform a quick fabric test – dampen a hidden area, rub mild detergent, check for color transfer after rinsing. If color bleeds or the fabric softens, proceed with hand washing or spot treatment only.
Avoid aggressive chemicals and ammonia-based products on textiles; aquarium additives are formulated for water treatment rather than fabric care – best ammonia remover for fish tank. For sturdier designs consult resources on transit and survival-oriented packs: best transit backpack, best backpack for survival.
Empty and prepare: remove inserts, unzip pockets, brush or vacuum loose dirt and crumbs
Remove all removable inserts (laptop sleeve, foam pads, organizers, insulated liners) and place them on a towel for inspection.
Tools
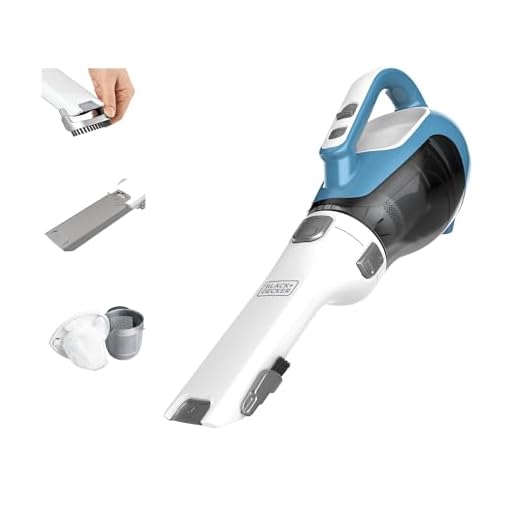
- Handheld vacuum with crevice tool (low suction)
- Soft nylon-bristle brush or old toothbrush
- Lint roller or wide masking tape for crumbs and hair
- Compressed air can or small air blower
- Tweezers or pointed pick for stuck particles
- Microfiber cloth and flashlight
Step-by-step
- Open every zipper and pocket, including hidden seams and zipper garages; empty coins, receipts, gum wrappers and loose change into a bin.
- Turn the pack upside down and give it two firm shakes over a trash can (about 5–10 seconds) to dislodge bulk debris.
- Roll a lint roller across the lining and mesh pockets to lift crumbs and hair; replace sticky sheets when they stop pulling debris.
- Use the nylon brush along seams, zipper teeth and pocket corners to loosen grit; immediately follow with the vacuum crevice tool to extract particles.
- For narrow channels and zipper cavities, apply short bursts of compressed air, then vacuum. Use tweezers for any fragments that remain stuck.
- Vacuum straps, back-panel channels and removable foam inserts on low power; keep the nozzle moving and hold webbing flat to avoid suction damage.
- Inspect every pocket with a flashlight. If crumbs are embedded in lining fibers, alternate brushing and vacuuming until the fabric looks free of debris.
- Lay removed inserts flat to air and wipe with a dry microfiber cloth; ensure they are completely dry and lint-free before reinserting.
Spot-treat stains: grease with dish soap, ink with rubbing alcohol, sweat and odor with baking soda paste
Test any solvent on an inconspicuous area for 10 minutes to check colorfastness and finish compatibility.
Grease (oil, food, sunscreen)
Apply one drop of concentrated liquid dish soap directly to the stain; work in gently with a soft‑bristle toothbrush or fingertip for 20–60 seconds. Let sit 10 minutes, then blot with a warm (not hot) damp microfiber cloth until no more oil transfers. Repeat up to three cycles if needed. For heavy oil, dust a thin layer of cornstarch or talc over the treated spot, leave 15–30 minutes to absorb, brush off, then repeat the detergent step. Do not tumble dry until grease is fully removed–heat sets oil.
Ink; sweat and odor
Ink: blot excess immediately with paper towel (do not rub). Moisten a cotton swab with 70–91% isopropyl alcohol and dab from the stain edge toward the center, switching swabs as they pick up ink. When transfer slows, rinse with cold water or blot with a damp microfiber. Stop and test if fabric dye shifts.
Sweat & odor: mix baking soda and water to a paste (3 parts baking soda : 1 part water), spread a thin layer over smelly straps or lining and let sit 30 minutes to overnight for heavy odor. Brush or vacuum powder away, then wipe with a damp cloth. For protein stains, pre‑treat by dabbing an enzyme laundry detergent solution (1 tsp per cup cold water) for 10–15 minutes before applying the baking soda paste. Always air dry away from direct sun and heat.
Safe machine-wash steps: secure zippers, protect with pillowcase or laundry bag, cold gentle cycle, gentle detergent
Zip every zipper fully, fasten any Velcro, tuck straps inside the compartment and place the item into a zip-closed pillowcase or a fine-mesh laundry bag (mesh openings ≤2 mm) before loading into the washer.
| Setting / Item | Recommended value | Notes |
|---|---|---|
| Water temperature | Cold (≤30°C / 86°F) | Prevents dye bleed and protects coatings |
| Cycle | Delicate / Gentle | Minimal agitation reduces seam and trim stress |
| Spin speed | Low (400–600 rpm) | Reduces deformation and zipper stress |
| Detergent | Mild liquid, 5–10 ml (1–2 tsp) if concentrated; use half normal dose for regular formulas | No bleach, no fabric softener; choose pH-neutral or sport-specific detergent |
| Load composition | Wash alone or with 1–2 bath towels | Towels cushion the item and balance the drum |
| Protection method | Zip pillowcase or fine-mesh bag; optionally wrap zippers in soft cloth | Prevents zipper teeth from catching and reduces surface abrasion |
| Drying | Air-dry flat or hang to drip-dry; avoid tumble dryer | Reshape while damp; dry away from direct sun and heat sources |
Remove immediately after cycle, unzip the protective case, inspect seams and hardware, reshape padding and allow 24–48 hours to dry; if the item has a water-repellent finish, restore according to the manufacturer’s instructions once fully dry.
Air-dry and reshape: hang or lay flat, reshape compartments and straps, avoid direct heat and tumbling
Air-dry immediately: hang on a wide padded hanger or lay flat on two layers of absorbent towels; expect 6–12 hours for thin synthetic shells and 24–48 hours for thicker fabrics, foam back panels or insulated pockets. Room temperature 18–24°C and relative humidity under 60% shortens drying time.
Hanging method: use the top carry loop or a padded hanger; support the base with a rolled towel to prevent sagging. Clip only at reinforced seams if using a clothes peg; avoid wire hangers that deform straps. Place 30–60 cm from a fan (low–medium) for faster airflow; rotate the pack every 2–4 hours so all faces get ventilation.
Laying-flat method: position main compartment facing up on towels, unzip pockets and vents partially to promote airflow, then insert rolled towels into chambers and between straps to restore original contours. Replace damp towels every 6–8 hours and flip the item after 8–12 hours to expose the back panel.
Reshape straps and padded panels: stuff shoulder straps, sternum and hip belts with paper or towels to maintain curvature; fasten buckles in their natural riding position while drying to set shape. For compressed foam, pat and gently manipulate padding when it reaches tacky dryness; do not wring or aggressively press while wet.
Avoid heat and tumbling: do not use a tumble dryer, radiator, hairdryer or heat gun; prolonged direct sun (more than ~30 minutes) can fade dyes and weaken fibers. If rapid drying is necessary, use circulating air from a fan rather than direct heat. Wipe metal hardware dry within one hour to prevent corrosion and keep zippers closed during drying to preserve structure, while leaving smaller pockets open for ventilation.


