


Gather your materials: a sturdy adhesive fabric, scissors, a ruler, and a cutting mat. Cut two large rectangles to form the front and back portions of your carrier, ensuring they are of equal size for symmetry. A good dimension to aim for is approximately 14 inches wide and 18 inches tall. This ensures ample space for essentials while remaining easy to carry.
Next, create the base and sides. Cut two additional strips, each about 4 inches wide and the same length as the width of your main pieces. These will serve as the sides and bottom, effectively giving structural integrity to your creation. Attach them carefully using overlapping strips of adhesive fabric to secure everything tightly together.
Handle styles enhance comfort and functionality. For shoulder straps, cut two long strips, about 3 inches in width and 30 inches in length. Fold each strip in half lengthwise, then adhere the edges together to achieve a robust design. Attach these straps to the upper corners of the front panel, reinforcing with extra layers of the adhesive material for durability.
Finally, customize your creation. Adding pockets is simple–just cut smaller rectangles and adhere them where desired. This not only improves organization but also showcases personal style. Let your project cure for at least 24 hours before use, ensuring everything is secure and ready for your daily adventures.
Crafting a Functional Carryall with Adhesive Sheets
For assembling a durable carryall, gather a few essential materials: strong adhesive sheets, a cutting tool, a flat surface for construction, and a measuring instrument. Adhere to precise measurements for the main panels, typically around 12×16 inches, ensuring ample space for your belongings.
Constructing the Base and Sides
Begin shaping the base by layering three sheets, overlapping them slightly for reinforcement. Cut two additional strips for the side panels, about 4 inches wide, and adhere them vertically to the side edges of the base. This combination provides a robust structure.
Adding the Strap and Finishing Touches
Utilize long strips, approximately 30 inches, for the shoulder strap. Fold them over for added support and attach securely to the sides with additional adhesive. To complete, consider incorporating pockets on the exterior for easy access, simply by folding smaller sections and adhering them into place.
Carefully trim any excess material for a polished look, ensuring all edges are secure to prevent wear over time. This will provide a practical and stylish solution for carrying your essentials.
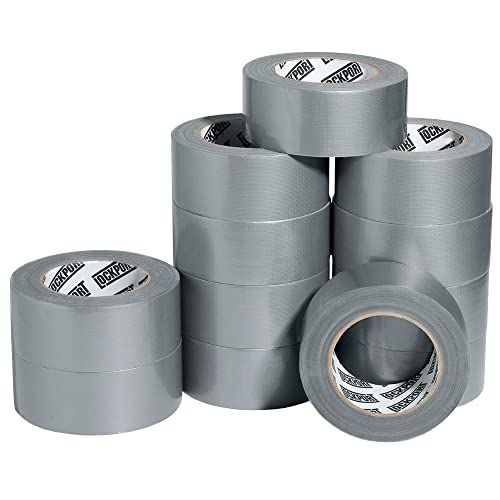
Choosing the Right Duct Tape and Materials
Select a high-quality adhesive strip for durability and flexibility. Look for brands known for their strength and resistance to wear, preferably with a cloth backing for added toughness. Color options vary, allowing for customization; opt for shades that suit your style or interests.
Pair the adhesive with a sturdy fabric foundation such as canvas or denim to enhance the project’s integrity. This combination ensures longevity and resilience, particularly in areas that may experience stress, like seams or straps.
Consider using foam or padding for interior sections to provide structure and comfort. Reinforcement in critical areas, like corners or where handles attach, enhances functionality and prevents wear.
Keep tools handy, such as scissors for clean cuts and a ruler for precise measurements. A cutting mat can help maintain a smooth surface while preventing damage to your work area.
Invest in quality straps or closures that complement your design. Metal fasteners or clips can improve both aesthetics and operability, providing secure closures. Choose hardware that matches the overall look and feel of your item.
Creating the Bag Structure with Duct Tape
Begin by cutting a large piece of adhesive material for the main body. Aim for a rectangular shape, approximately 24 inches wide by 30 inches long. This will provide ample space for your belongings.
Next, fold the rectangle in half, aligning the shorter edges. This creates a bottom seam, securing it with a strip of tape along the raw edges for added stability. Turn the structure inside out for a cleaner appearance.
Forming the Flap and Strap
To create the flap, cut a separate piece, around 10 inches wide and 15 inches long. Attach it at the top edge of the rectangular section, ensuring it overlaps to cover the opening. Use additional pieces to secure it firmly, maintaining functionality while enhancing durability.
For the strap, select a lengthy strip about 50 inches long and 3 inches wide. Fold it in half lengthwise, securing the edges with adhesive. Attach each end to the sides of the bag, ensuring it hangs at a comfortable height for shoulder use.
Final Touches and Reinforcement
To strengthen the corners and edges, place small reinforcement pieces of tape over high-stress areas. This ensures longevity and prevents tearing. For improved practicality, consider attaching a small loop or hook for easy access to essentials.
After constructing the basic form, further personalize with additional embellishments or pockets as desired. For care recommendations, applying the best car foam soap for pressure washer can help keep your creation clean and well-maintained.
Adding Straps and Closure Mechanisms
For securing your creation, consider using adjustable fabric straps. Cut two lengths of durable material, a little longer than the desired strap length, and fold them over to reinforce. Attach them to either side of the structure using strong adhesive or by punching holes and weaving them through. Ensuring they are well-anchored will improve stability during use.
Creating Strap Adjustability
Incorporate buckles or sliders for length adjustments. A simple way to achieve this is by threading the strap through a sliding buckle, allowing for easy customization. You can find various styles of buckles at craft stores or repurpose from old bags.
Effective Closure Options
For a reliable closure, Velcro or magnetic snaps are recommended. If opting for Velcro, cut two strips, ensuring the hooks and loops connect securely. For magnetic snaps, sew or adhere the pieces at the top flap and main body to allow easy access while keeping contents secure. This method is efficient for daily use and maintains a sleek, minimalistic look.
Explore additional accessories to enhance functionality, such as adding a pocket for small items or an adjustable strap for comfortable wear. If you’re looking for lightweight options, consider materials suited for everyday portability alongside the best electric backpack leaf blower as a handy tool for outdoor activities.
Customizing Your Bag for Style and Functionality
Utilize various colors and patterns for an eye-catching look. Select a primary color for the base and complement it with contrasting or matching shades for accents.
Additional Features
- Incorporate pockets of different sizes to enhance organization.
- Add interior dividers to separate personal items.
- Include an exterior flap or magnetic closure for quick access.
Personal Touches
- Adorn with patches or stickers reflecting your interests.
- Consider adding custom designs or logos using fabric paint.
- Experiment with different straps: braided cord, webbing, or padded options.
Choose to incorporate zippers, velcro, or snap closures based on your convenience and style preference. Ensure that the chosen materials are durable for everyday use.
Opt for embellishments such as reflective strips for safety or functional features like bottle holders or detachable pouches. These additions not only enhance aesthetics but also provide practicality.


