For those eager to create a stylish and functional accessory, a small hand-held creation can be your best choice. Utilizing a round knitting frame, one can efficiently create beautiful designs that cater to both utility and aesthetics. This guide will take you through straightforward steps to create your own portable fashion piece.
Choose a softer yarn to ensure comfort and flexibility; a worsted weight is generally suitable for beginners. The first step involves securing a starter knot on your frame and evenly casting your stitches around the pegs. Keep tension consistent to enhance the overall appearance of your crafted item.
As you progress, consider incorporating a contrasting color for added flair. This technique not only showcases your creativity but also enhances the visual depth of your finished product. Remember to regularly check your work for loose stitches or uneven tension, ensuring a polished finish that highlights your skill and attention to detail.


Crafting a Unique Carrier Using the Knitting Tool
For creating a compact carrier, select a sturdy yarn that can withstand daily use. Cotton blends offer durability and are easy to clean. Choose your preferred color palette to add a personal touch to your project.
Steps to Follow
Begin by measuring the desired dimensions for your pouch. A typical size might range from 8×10 inches. Set up your knitting tool with a sufficient number of pegs, keeping in mind the thickness of your yarn. A larger gauge will yield a more spacious interior.
For the base, knit a flat rectangle. This will serve as the foundation, providing rigidity. Attach side panels to create the walls, ensuring to bind the edges securely for stability.
Finishing Touches
Once the structure is complete, consider adding a strap for ease of carrying. Use a braided technique for a sturdy yet flexible handle. Finally, embellish the exterior with decorative elements such as buttons or patches to personalize your creation.
| Material | Recommended Type |
|---|---|
| Yarn | Cotton blend |
| Knitting Tool | Round loom or knitting board |
| Closure Options | Buttons, snaps, or clasps |
Enhance your crafting experience by enjoying your favorite activities alongside. For instance, while creating this unique carrier, consider engaging with a best active rolling ball for dogs to keep a playful pet entertained.
Choosing the Right Loom and Yarn for Your Creation
Select a loom with appropriate peg spacing for your desired dimensions. A loom with tighter spacing yields a denser fabric suitable for structure, while wider spacing creates a more flexible and softer feel. For an ideal size, consider a medium loom, often featuring 24-36 pegs, which balances portability and capacity.
Yarn Selection
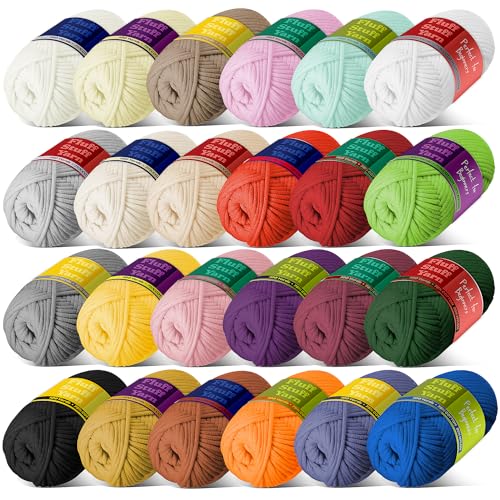
Opt for medium-weight yarn such as worsted or DK, ensuring it complements your design’s aesthetic. Natural fibers like cotton or wool provide durability and a pleasant texture, while synthetic options offer vibrant colors and ease of care. Check the yarn label for the recommended gauge to match your loom correctly.
Combination Tips
<p Experiment with mixing yarn types for visual interest and unique textures. If the goal includes a structured piece, incorporate a stiffer yarn in the base while using softer yarns for embellishments. For advice on selecting suitable gear when out and about, check the best age for umbrella stroller.
Basic Knitting Techniques You Need to Know
Understanding the U-stitch is fundamental. This technique creates a stable edge that prevents unraveling, making it ideal for bags. To execute it, wrap the yarn around the peg, then use your hook to draw the yarn through both the loop on the peg and the yarn wrapped around it.
The e-wrap method adds a textured finish. Simply wrap the yarn around the peg in a continuous motion. This creates a nice, rounded stitch that adds depth to the fabric.
Creating a double knit fabric can enhance durability. Place yarn on both the inside and outside pegs to form a tube. This technique produces a reversible design, perfect for projects that require sturdiness.
Binding off correctly ensures your project is secure. After finishing your last row, move the first stitch over the second and off the peg. Repeat this for all stitches until only one remains, then cut the yarn and pull through.
Maintaining consistent tension is key. Adjust your wrap tension as you go, ensuring that stitches aren’t too tight or too loose, which affects the final appearance and stretch.
Incorporating color changes can create striking patterns. Plan where to switch colors by finishing the last stitch of one color and joining the new yarn directly to the next peg.
Casting On and Creating the Base of the Bag
Begin with the long-tail cast on technique for a sturdy foundation. Measure out a length of yarn approximately four times the width of your intended accessory. Create a slip knot on the first peg of your device, ensuring it is secure.
Continue by placing your yarn around each peg in a clockwise direction, forming the first row. Complete this row by wrapping each peg once, followed by a second wrap for added stability. This double wrap method ensures a robust base.
Once your initial row is in place, utilize a hook to lift the bottom loop over the top loop on each peg. Transition through all pegs, securing the stitches and forming the foundational layer. Repeat this process, adding more rows until you achieve the desired dimensions. Aim for at least six to eight rows to establish a solid bottom structure.
Consistency is crucial; ensure your tension remains even throughout to prevent distortion. As you progress, periodically check the width and height, making adjustments if necessary for a balanced shape. This careful approach sets the stage for further embellishments or linings as you construct your piece.
Adding a Flap and Straps to Your Creation
Incorporate a flap and straps for functionality and style. Follow these steps to enhance your project:
Creating the Flap
- Measure the width of the top of your item and add 2 inches for seam allowance.
- Decide on the height; around 6 to 8 inches is generally adequate.
- Use a contrasting color yarn for visual interest or stick to the same color for a cohesive look.
- Cast on enough stitches to match the width measurement. Work your rows until you reach the desired height. Bind off.
- Attach the flap to the top of your project using a whip stitch or a similar technique for a clean finish.
Adding Straps
- For a sturdy strap, consider creating an I-cord or a simple flat strap. Aim for a length of 40 to 50 inches for crossbody use.
- For the I-cord, cast on 3 stitches and work in the round until you reach the desired length. Bind off.
- For a flat strap, cast on 10 to 15 stitches and knit until you achieve your desired length, then bind off.
- Attach each end of your strap to the sides of the creation with a secure stitch. Reinforce the attachment for extra durability.
Consider using your new item in tandem with the best luggage interiors for a complete travel look.
Finishing Touches: Weaving in Ends and Customizing
To achieve a polished appearance, carefully weave in any loose ends using a yarn needle. Thread the needle with the yarn tail and insert it into the stitches of the fabric, ensuring it blends seamlessly with the surrounding stitches. Repeat this process on both the interior and exterior sides to secure all ends, preventing unraveling.
Personalizing Your Creation
Add unique flair by incorporating embellishments. Consider sewing on decorative patches or adding beads to enhance visual interest. For a custom touch, experiment with contrasting or complementary colors for straps or flap linings. Stencils or fabric paint can be utilized to create designs directly on the surface.
Finishing the Edges
For a neat finish, use a slip stitch or single crochet around the edges. This will strengthen the structure and prevent fraying. Carefully block the item if necessary to maintain its shape, laying it flat on a surface and gently stretching to desired dimensions.