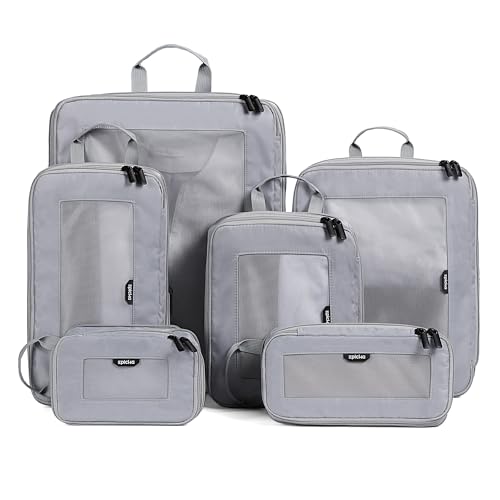


To craft a durable and stylish transport solution, select robust waterproof material that can withstand daily wear. Look for a fabric that features a smooth surface, which will facilitate easy cleaning and maintenance.
Cut the chosen material into appropriate dimensions to form the main portion and additional sections for pockets and flaps. Incorporating a sturdy lining can enhance the structure and provide extra support, ensuring that your creation holds its shape over time.
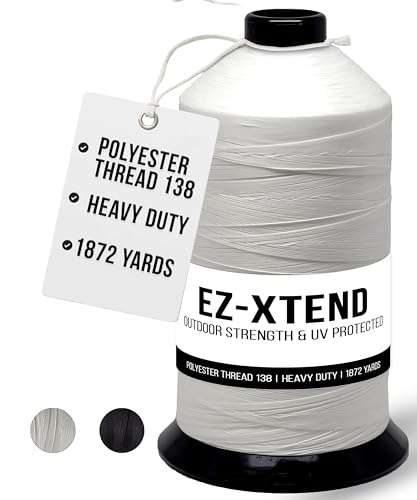
Utilize a strong thread and an appropriate needle specifically designed for heavier fabrics during the assembly process. Reinforce stress points with additional stitches for enhanced durability, making certain that your finished product can carry its contents securely.

Lastly, pay attention to the finishing touches. Add adjustable straps for comfort and a personal flair with unique embellishments or colors, creating a custom piece that’s both functional and aesthetically pleasing.
Creating a Durable Tote from Waterproof Fabric
Choose high-quality waterproof material that is easy to clean and maintain. Look for fabrics with a thickness of at least 0.5mm for sturdiness.
Required Tools and Materials
- Waterproof fabric
- Matching thread
- Cutting mat and rotary cutter
- Sewing machine with a walking foot
- Scissors
- Measuring tape
- Pattern for the design
- Fabric clips or pins
Step-by-Step Construction
- Cut the fabric according to your pattern, ensuring to include seam allowances of at least 1 inch.
- Assemble the main compartment by sewing the side seams together. Use a straight stitch and ensure fabric edges are aligned.
- Attach any interior pockets, reinforcing these areas for added durability.
- Create the flap by cutting a separate piece of fabric. It should be wide enough to cover the top opening comfortably.
- Add a closure mechanism, such as Velcro or magnetic snaps, to secure the flap.
- Finish the edges of the main compartment and flap with a zigzag stitch to prevent fraying.
- Add shoulder straps that are long enough for comfortable wear. Securely attach them to the sides of the bag.
- Inspect all seams for any weaknesses and reinforce with additional stitching where necessary.
Ensure the final product is watertight by applying seam tape on the inside seams for additional protection against moisture.
Choosing the Right Oilcloth Material for Your Bag
Select an oilcloth that features a high resistance to water and stains, ensuring durability for everyday use. Look for a fabric that boasts a smooth finish, which will not only enhance aesthetics but also facilitate cleaning. Consider weight; a lightweight option tends to drape better and makes carrying more comfortable.
Types of Oilcloth
Different types of oilcloth offer varying benefits. Heavyweight varieties provide sturdiness for structured designs, while lighter options are suitable for softer silhouettes. Additionally, investigate whether the fabric is treated with UV protection to prevent fading from sunlight exposure.
Patterns and Colors
Select patterns and colors that resonate with your personal style but also consider versatility for pairing with different outfits. Geometric or floral prints can make a bold statement, while solid colors lend themselves to a more classic appearance. Ultimately, the choice should reflect your taste while being practical for various occasions.
For travel enhancements, consider adding the best luggage tags for international travel to your project.
Essential Tools and Supplies for Creating an Oilcloth Carrier
Gather the following items: sturdy sewing machine with a walking foot, heavy-duty needle (size 90/14 or larger), and thread designed for outdoor fabrics. These components ensure smooth stitching through thicker materials.
Cutting Tools
A rotary cutter, mat, and clear acrylic ruler facilitate precise cuts. Accurate measurements prevent fabric wastage and guarantee well-fitted components.
Additional Supplies
Keep on hand double-sided tape for temporary holds, clips rather than pins to avoid fabric distortion, and a seam ripper for corrections. A pressing cloth protects the surface while sealing seams and creases. Adhesive patches are useful for unexpected repairs.
Step-by-Step Instructions for Cutting Oilcloth Pieces
Begin by gathering the required pieces of your chosen material. Ensure that the oil-resistant surface is facing upwards for accurate measuring. Use a clear ruler to mark the dimensions directly onto the fabric with a fine-tipped permanent marker or a chalk pencil for precision.
Measuring and Marking
Measure out the desired lengths and widths for each component, including front and back panels, sides, and interior pockets. Double-check your dimensions against the pattern or template you are using. Make sure to include seam allowances, typically around 1/4 inch, for each edge.
Cutting Techniques
Utilize sharp rotary cutters or fabric scissors specifically designed for thicker materials. Cut slowly and steadily to maintain straight edges. If necessary, secure the fabric with weights or pins to prevent slipping during this process. After cutting, inspect the edges to ensure they are neat and even, trimming any uneven sections.
Once completed, store your cut pieces flat to avoid any creases until you are ready for assembly. For those planning a trip, check out the best luggage brands for international travel australia for some quality options to accompany your new creation.
Techniques for Sewing Oilcloth Without Puckering
Use a walking foot on your sewing machine to maintain even feeding of the material layers, preventing puckering during stitching.
Adjust your sewing machine tension carefully. Lowering the top thread tension slightly can help in achieving smooth seams without distortion.
Opt for a longer stitch length. A 3.5 to 4.0 mm setting is recommended, as shorter stitches may cause the layers to gather.
Incorporate tissue paper or a water-soluble stabilizer under the fabric while sewing. This support reduces friction and helps in achieving a smooth finish.
Increase your sewing speed. A steady, faster pace tends to yield better results, helping to eliminate gathers that occur from slow, hesitant stitching.
Use sharp needles designed for heavier materials, such as ballpoint or universal needles. These types minimize the risk of creating holes and promote smoother sewing.
Be mindful of pin placement. Use clips or flathead pins to minimize bulk and avoid shifting layers while sewing.
Consider pressing seams open as you go, rather than folding them. This technique maintains fabric alignment and prevents puckering along the seam lines.
Finishing Touches: Adding Straps and Closures to Your Bag
Attach adjustable straps using D-rings and webbing for versatility. Cut two lengths of webbing to your desired strap length, typically around 1.5 meters. Fold the ends of the webbing and sew them securely to D-rings, ensuring the stitching is reinforced for durability. Position the D-rings on the sides of your creation to allow for comfortable carrying, adjusted easily for different wearers.
Choosing the Right Closure Mechanism
Incorporate a magnetic snap or Velcro for easy access. If opting for a magnetic snap, position it centrally inside the opening flap for seamless closure. Mark and sew the snap halves, ensuring they align properly for a secure fit. For Velcro, affix one strip to the flap and the corresponding piece to the main section, taking care to ensure they align when closed.
Final Assembly and Considerations
Before final assembly, double-check all stitch integrity and secure any loose threads. Test the functionality of the straps and closures to ensure they operate reliably. To enhance the water-resistant qualities, consider applying a sealant to seams once construction is complete. For more insights on material functionality, see this link: which organelle is responsible for synthesizing proteins.